A hobby is a valuable outlet for those days when things get tough, as well as a nice way to recharge your mental “batteries” and come back to work re-energized. My hobby is making things with my hands, mostly woodworking nowadays. Here is a small gallery of projects.
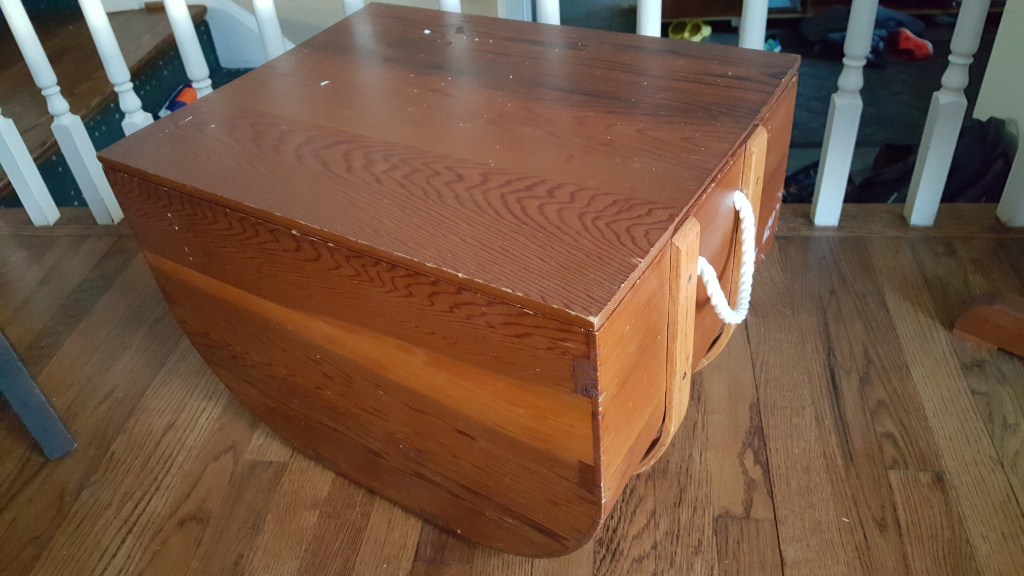
Wannigan. A wannigan is a wooden box designed to fit inside a canoe. This was one of my first real woodworking projects. I made it out of red cedar with oak steam-bent rails.
Cradle. This was a largely unsuccessful project. The angles were a pain to get right and the size was altogether too large. Babies slept in it at most a couple of times. The material was cherry.


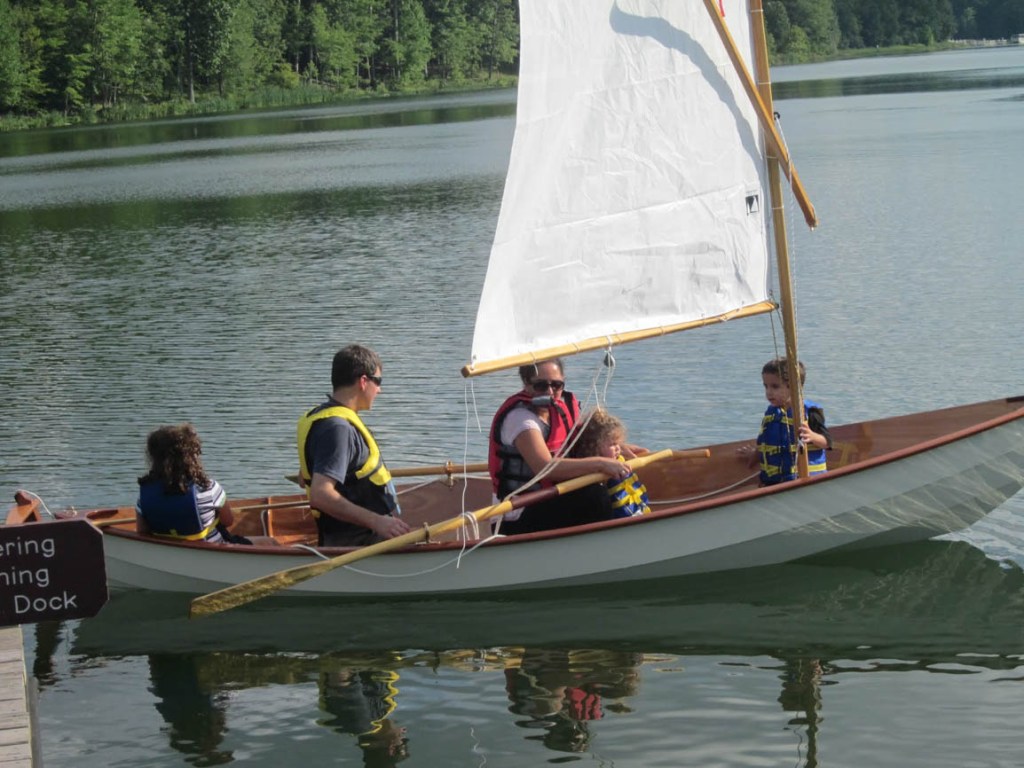
Sailboat/rowboat. My gift for getting tenure was to build a boat – something I had wanted to do for a long time. This is a skerry (inspired by old Norse boats) built from a kit from Chesapeake Light Craft in Annapolis. Don’t let the word “kit” fool you. It took over 200 hours of work over about 3 months to get it done to a “union best effort” level of quality. It does float and sails quite well.
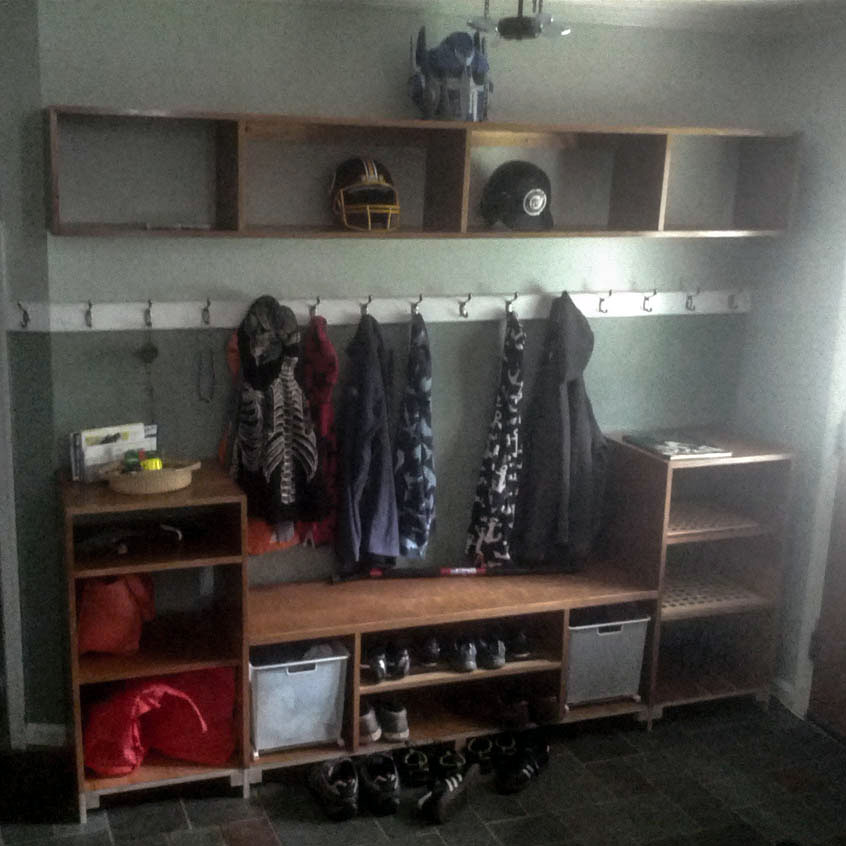
Space organizer. When you get a new house you need a place to stash things as you walk in the door.
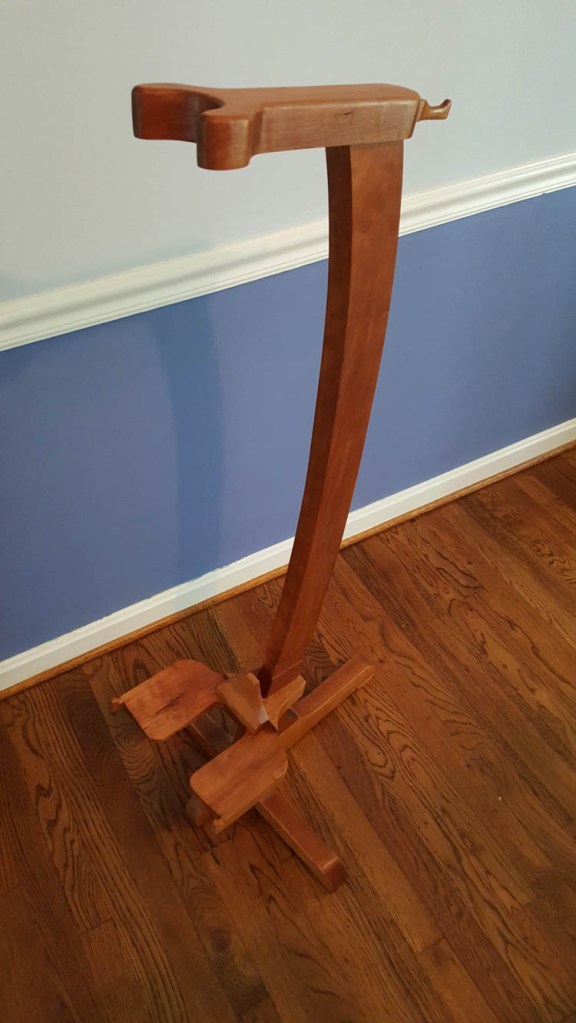
Cello stand. And a place to store a cello. Material is cherry, and the base adjusts to accommodate all size cellos.

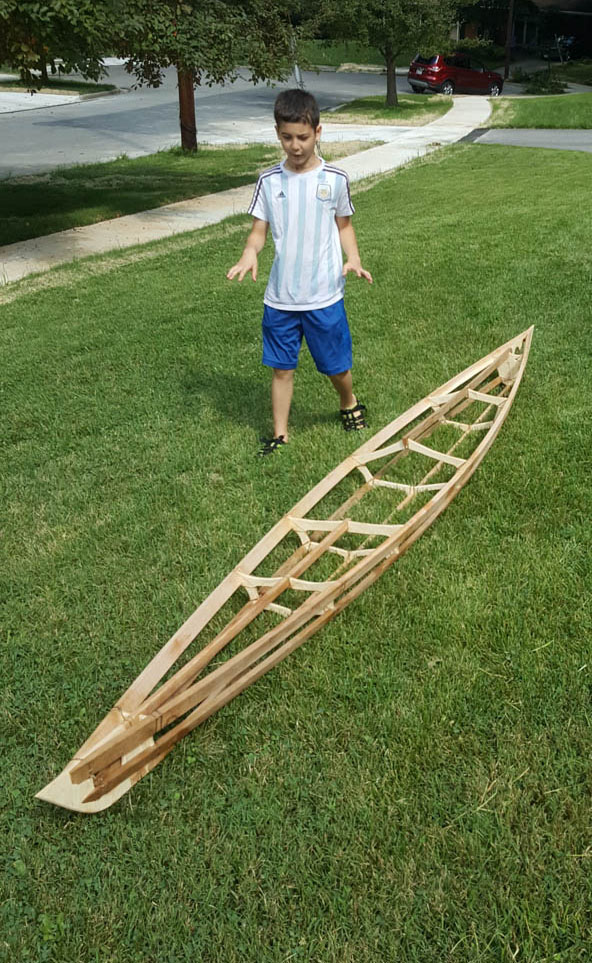
More boats. The most recent boat building adventure involves skin on frame kayaks. The frame is built out of baltic birch plywood and red cedar tied together with artificial sinew, then the boat is covered with polyester fabric and made waterproof with good old porch paint.


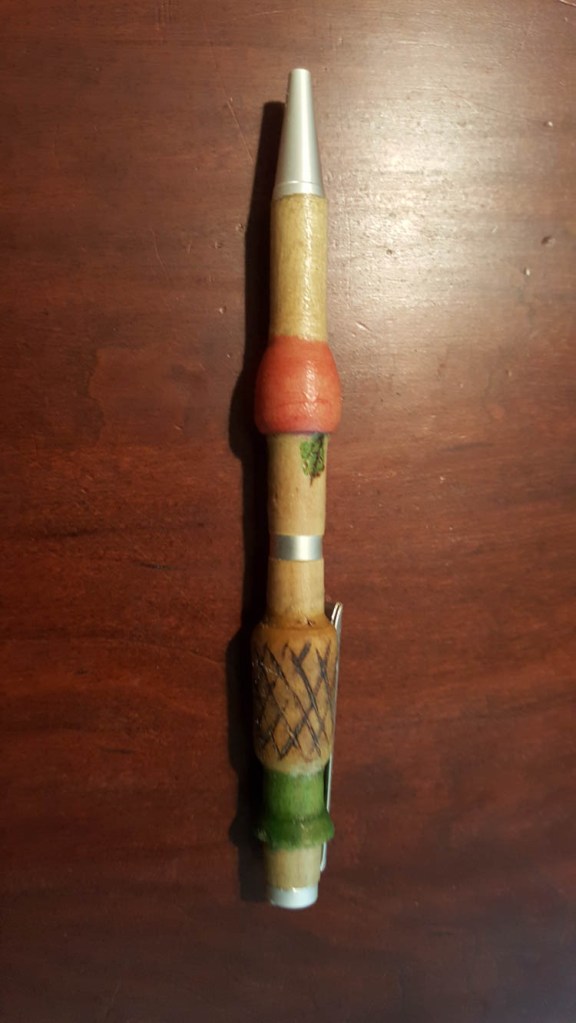
Pen pineapple apple pen. If this doesn’t make sense, just google it. … my apologies. Made out of poplar and finished with CA glue.

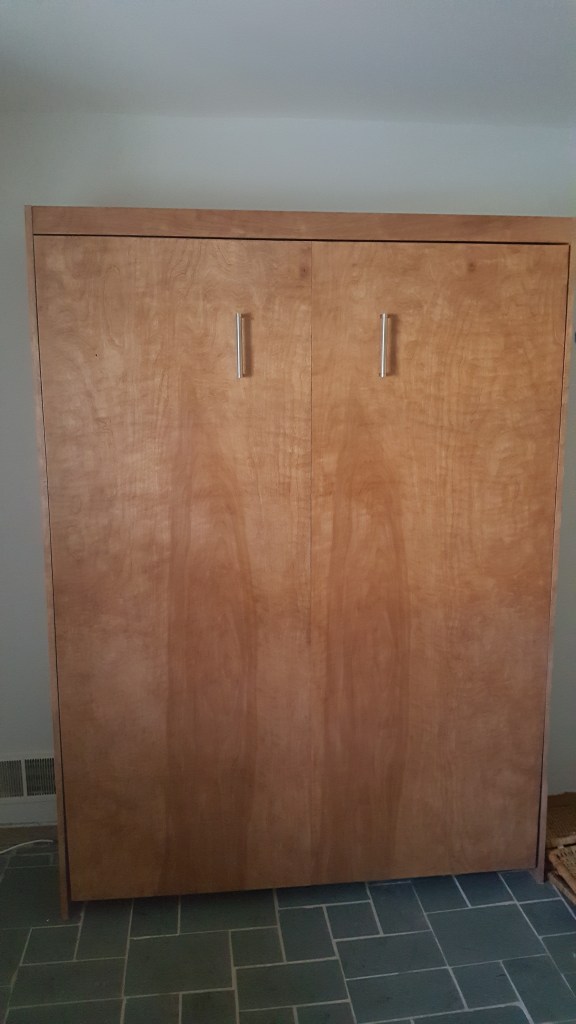
Murphy bed. A nice solution to the frequently unused guest room. Now the space can be used more efficiently when visitors are not around. Bought the hardware kit online, and built the frame from plywood. A (somewhat) fun project if you have a couple days to spare.
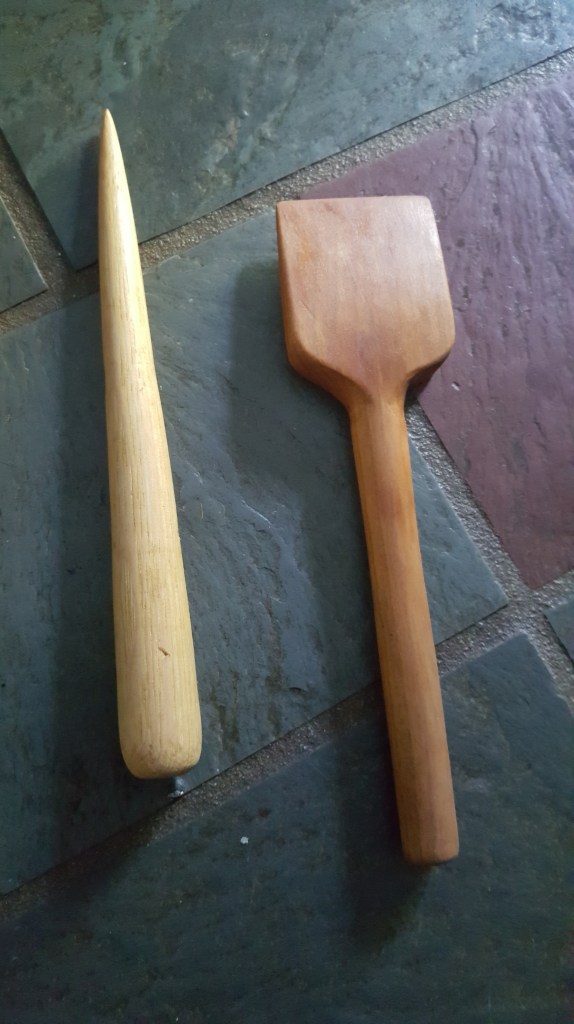
Fid and seam rubber. If you want to sew your own sails you need the right equipment, though it’s becoming harder and harder to buy equipment for those who want to use the traditional methods. So there I found myself needing to make a fid (a spikey stick used to enlarge holes and separate rope strands) and a seam rubber (a flat piece of wood with a handle used to rub down fabric seams so they stay flat while being sewn). Both were made on the lathe, the fid from a piece of maple from my firewood pile, and the seam rubber from a piece of cherry.
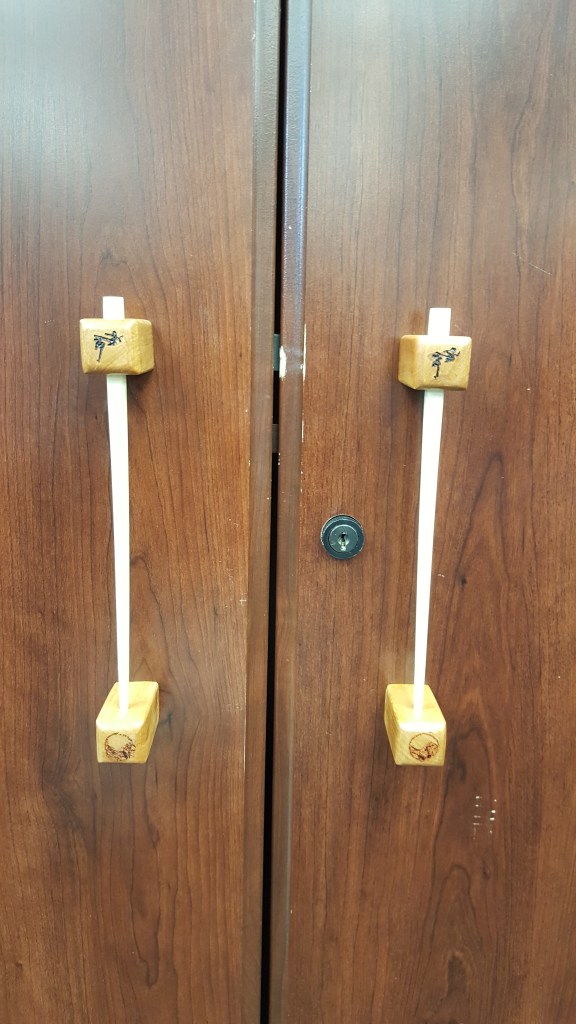
Door handles. A cabinet at my taekwondo studio had lost its handles so I made a couple, re-purposing a pair of chopsticks and scraps of cherry.

Kitchen table. This is my first commission! Friends have asked me to build them a long and narrow table for an awkward space in their kitchen. After a trip to Frederick to explore wood choices we settled on cherry with a 3/4″ plywood table top with a figured cherry edge banding. In retrospect, the top is a bit thin and too flexible and may need reinforcement if the “customers” so request. The edge banding is mitered and also beveled so that the table appears to be much thinner than it actually is.
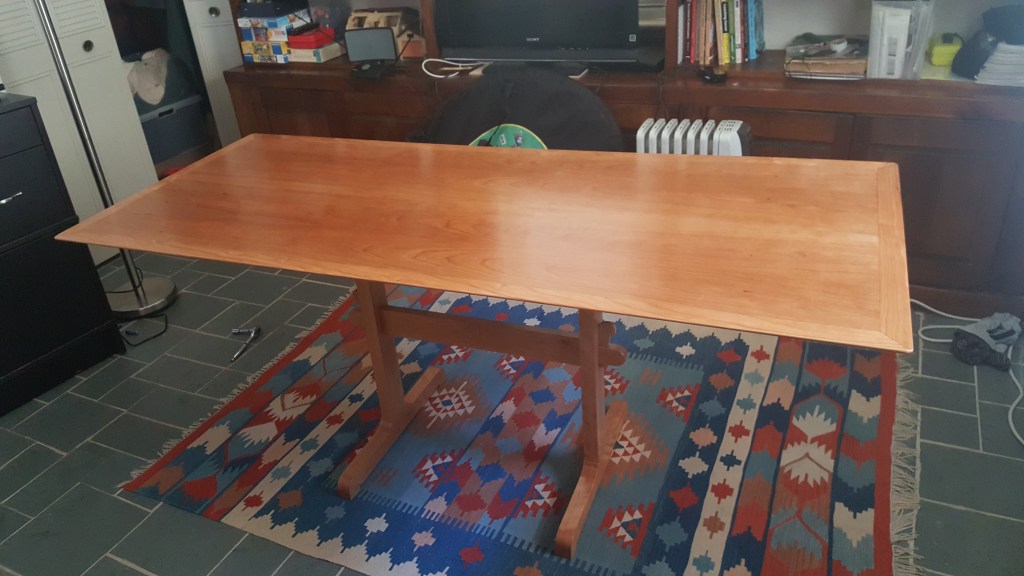

The legs (left) are attached to the top with 3/4″ bolts. I used T-nuts secured within two wood strips glued to the table top instead of trying to carefully drill the nuts into the plywood itself.
The wedges holding the stretcher together are hand-carved with the initials of my friends.
In building the table I had the foresight to put two coats of finish on the leg pieces before gluing the mortise and tenon joints together. Doing so allowed me to easily handle the glue squeeze-out with a damp cloth and avoid the invariably painful sanding.
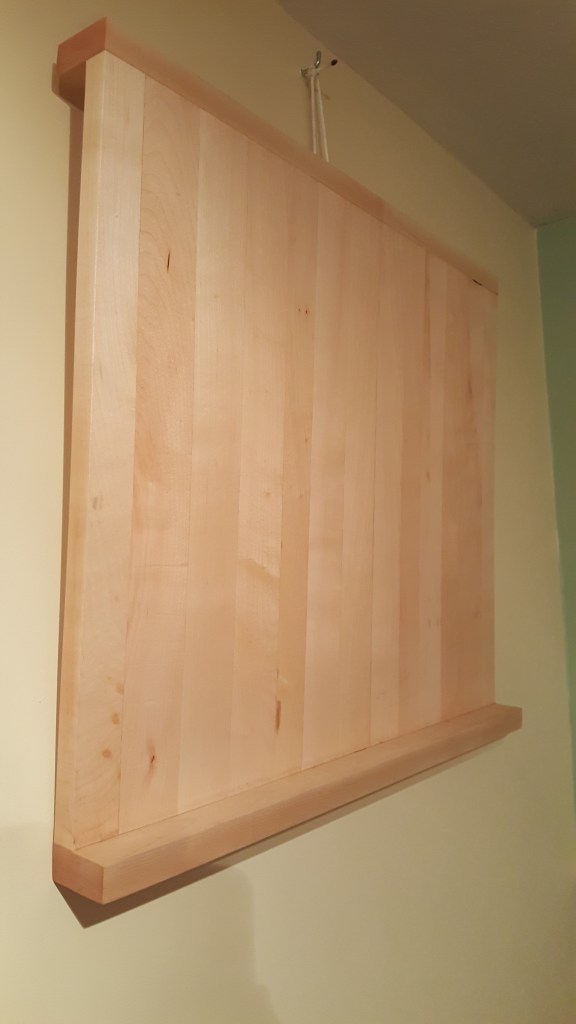
Kneading board. I like making bread but never had a good surface to work on, so I built this bread kneading board out of hard maple. When installing the two breadboard rails I made the mistake of gluing them. As the wood shrunk during fall and winter, the board developed a nice crack right down the middle. The crack remains but I eliminated the problem by breaking off the glue and attaching the ends to the board with screws driven through enlarged holes.
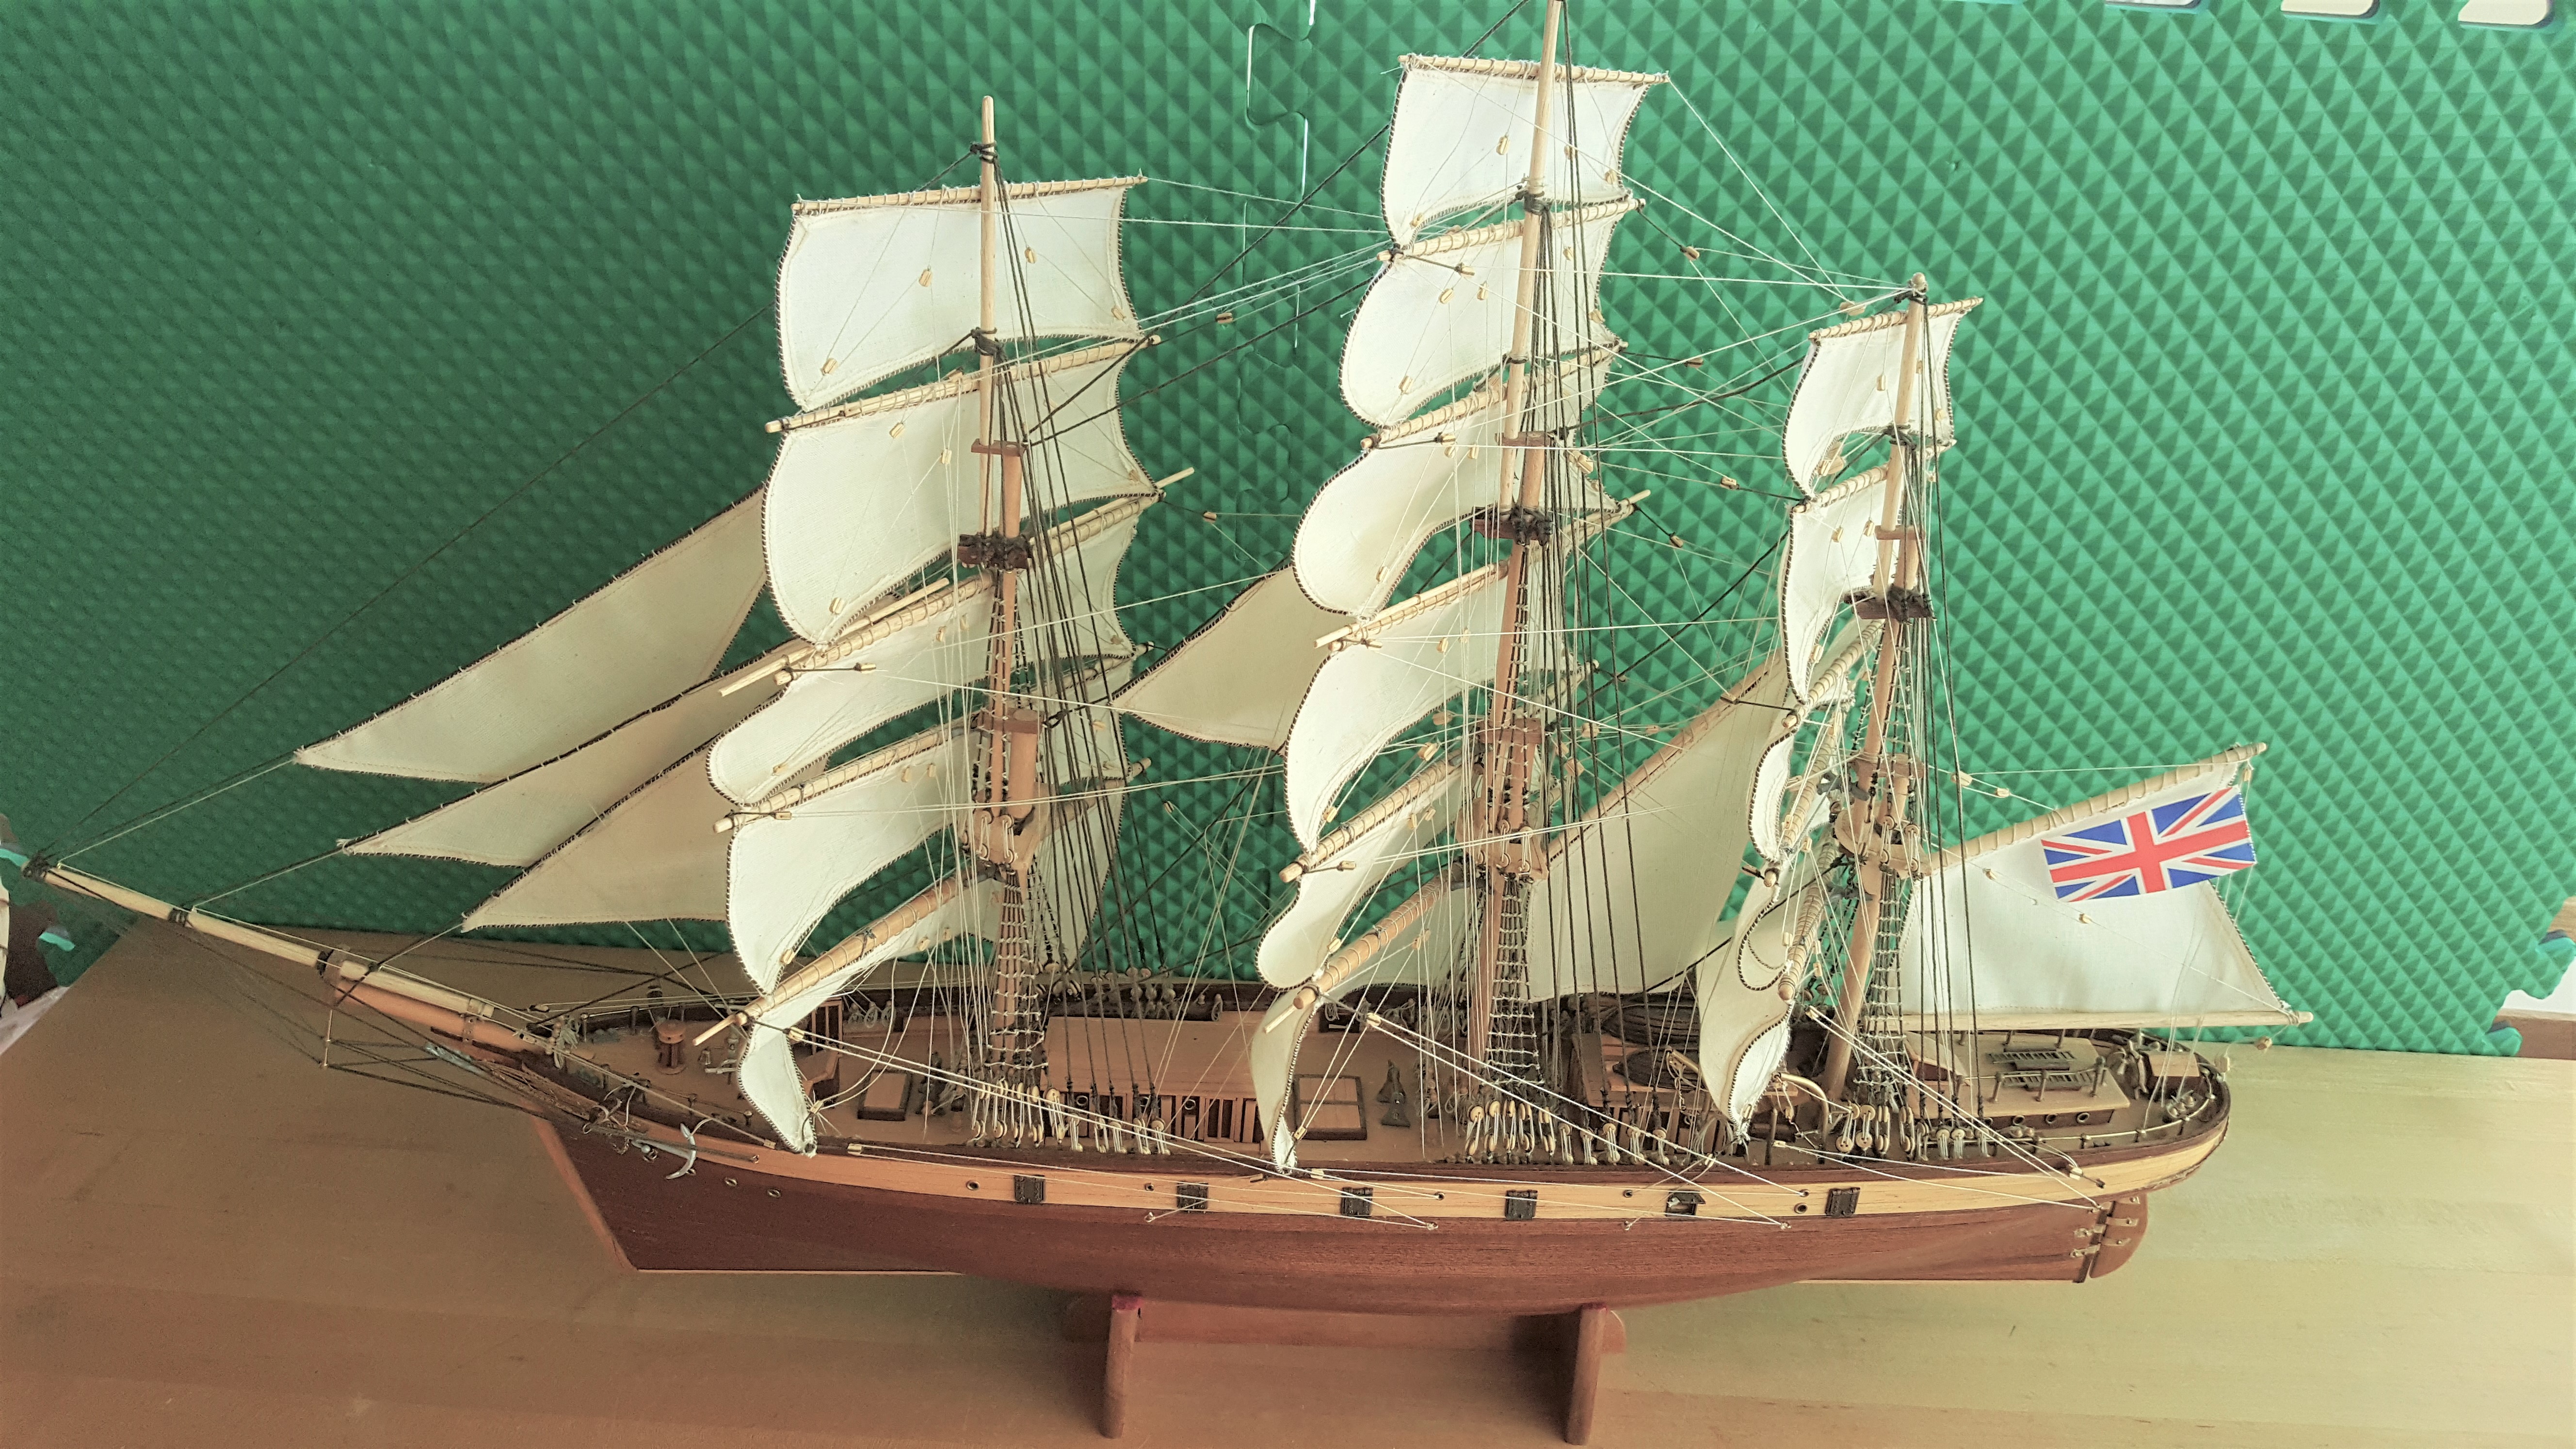
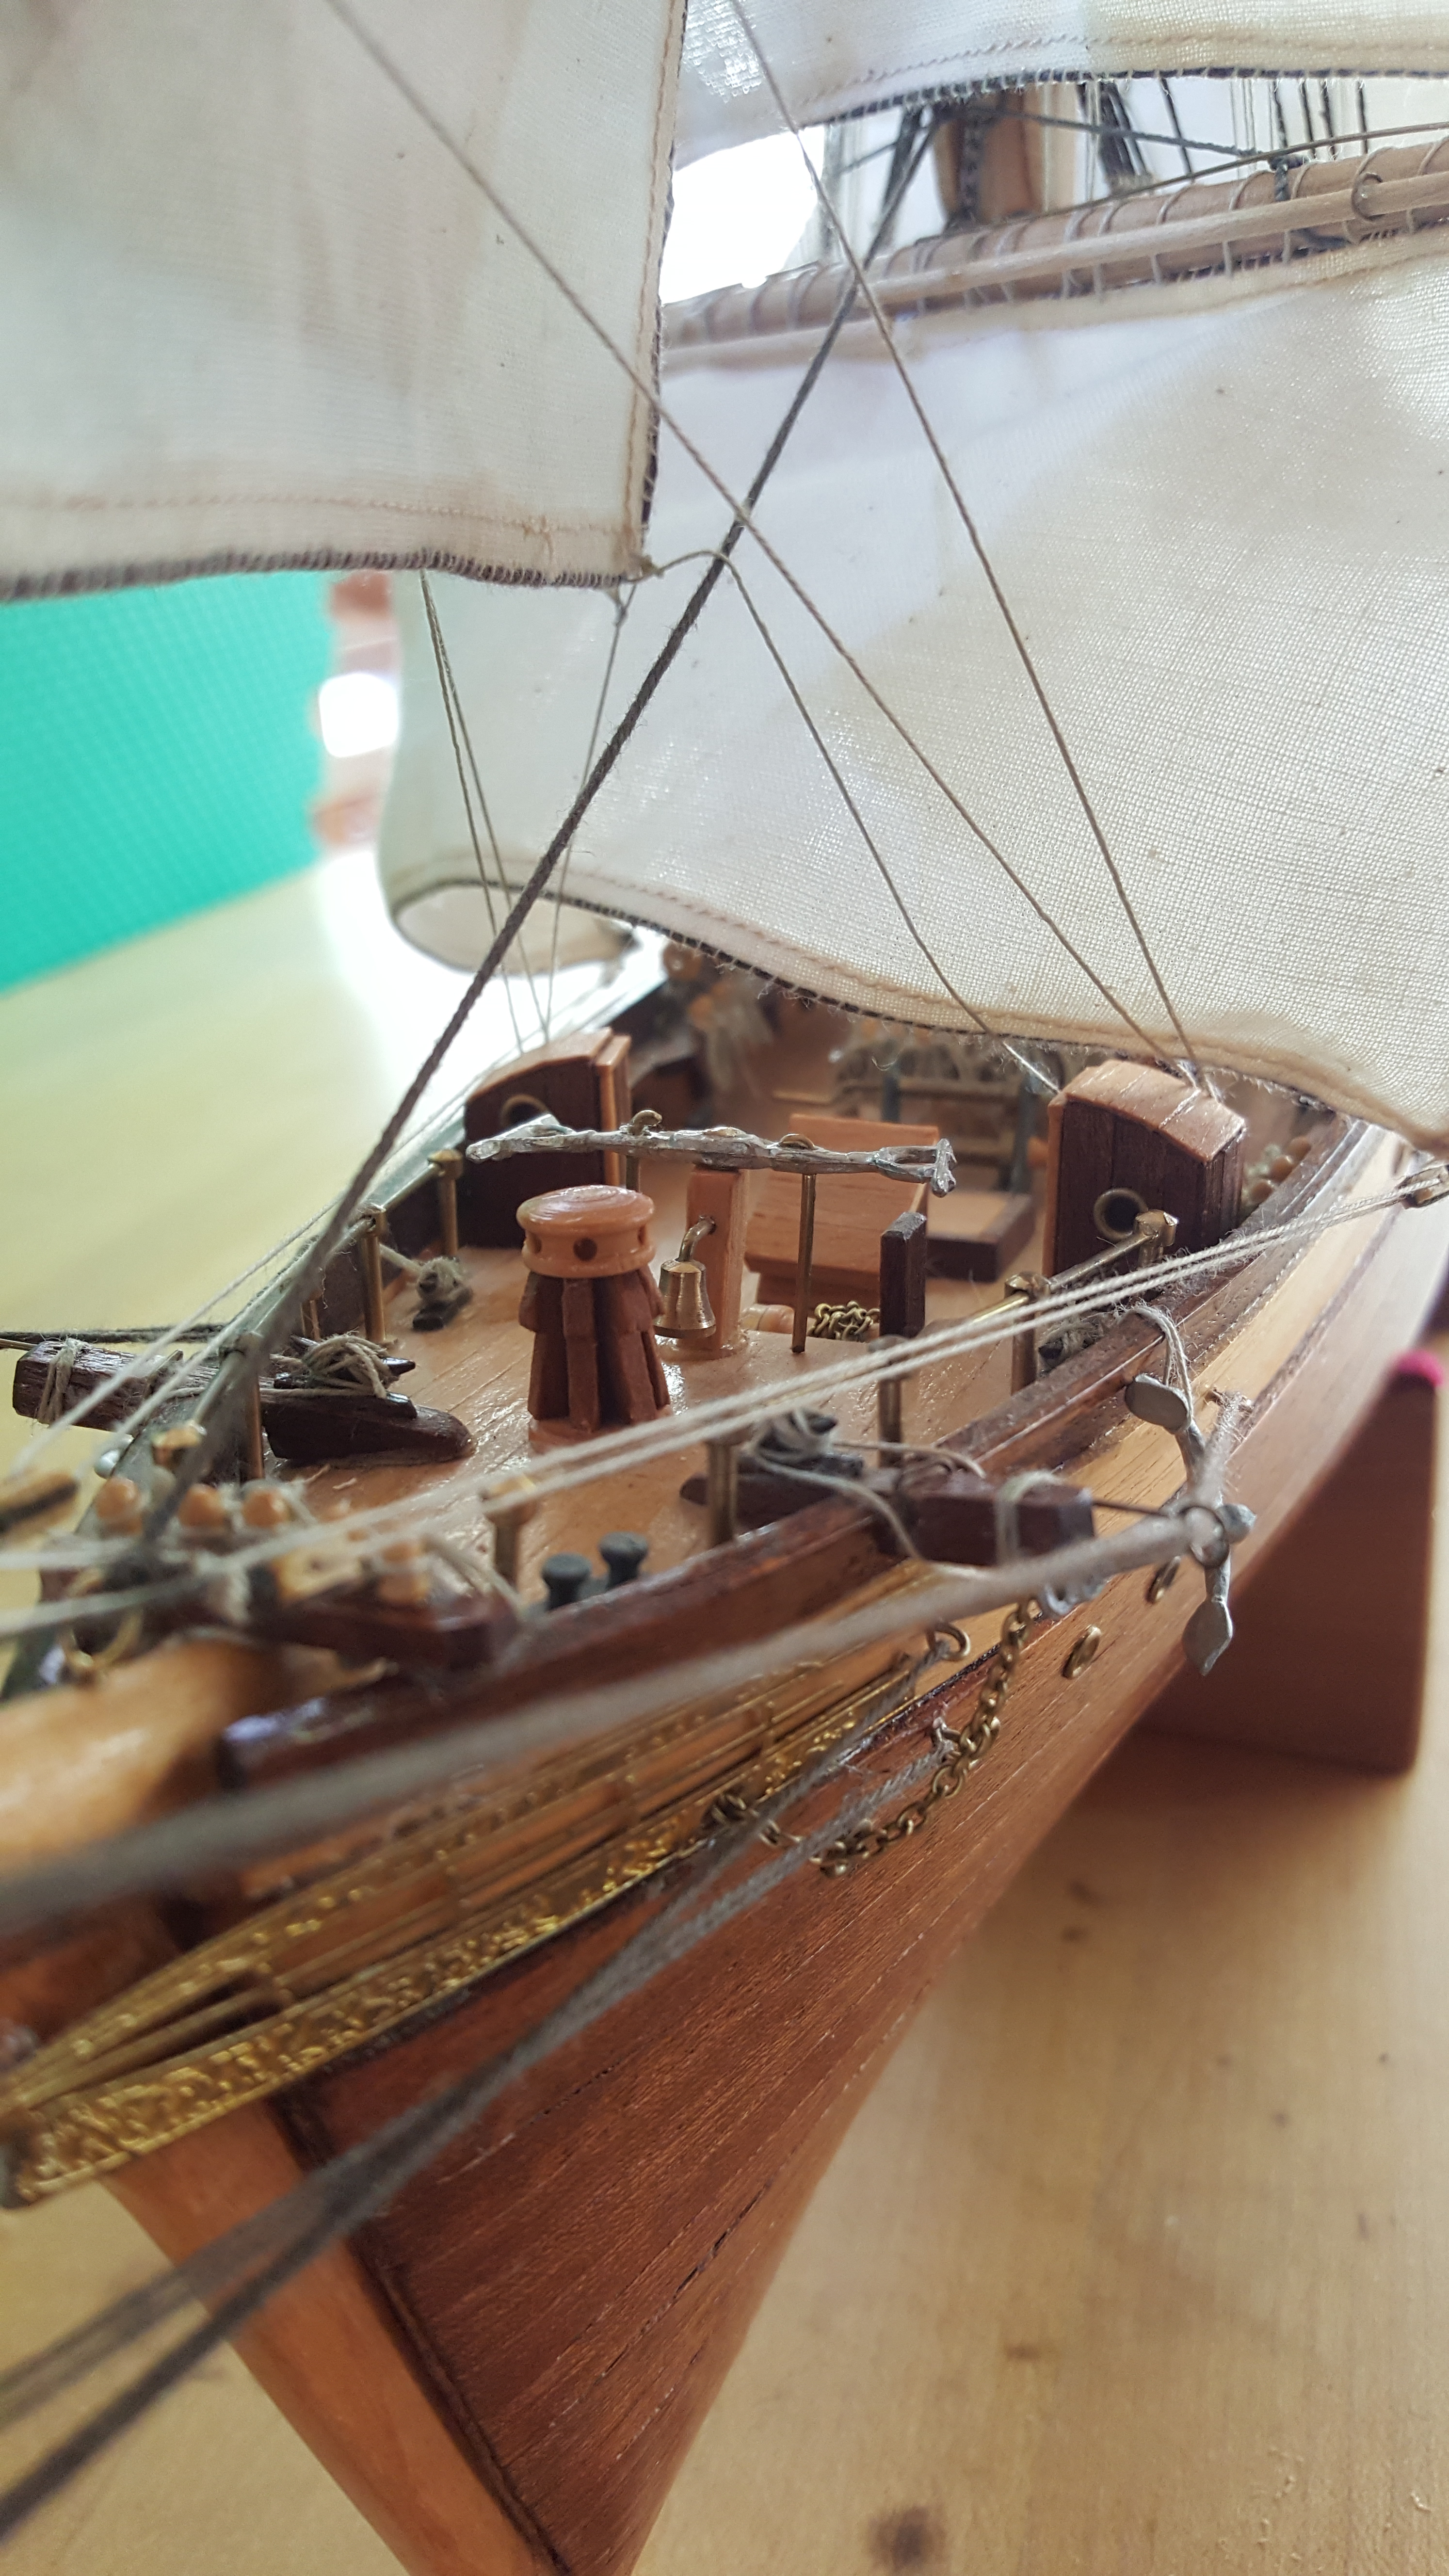
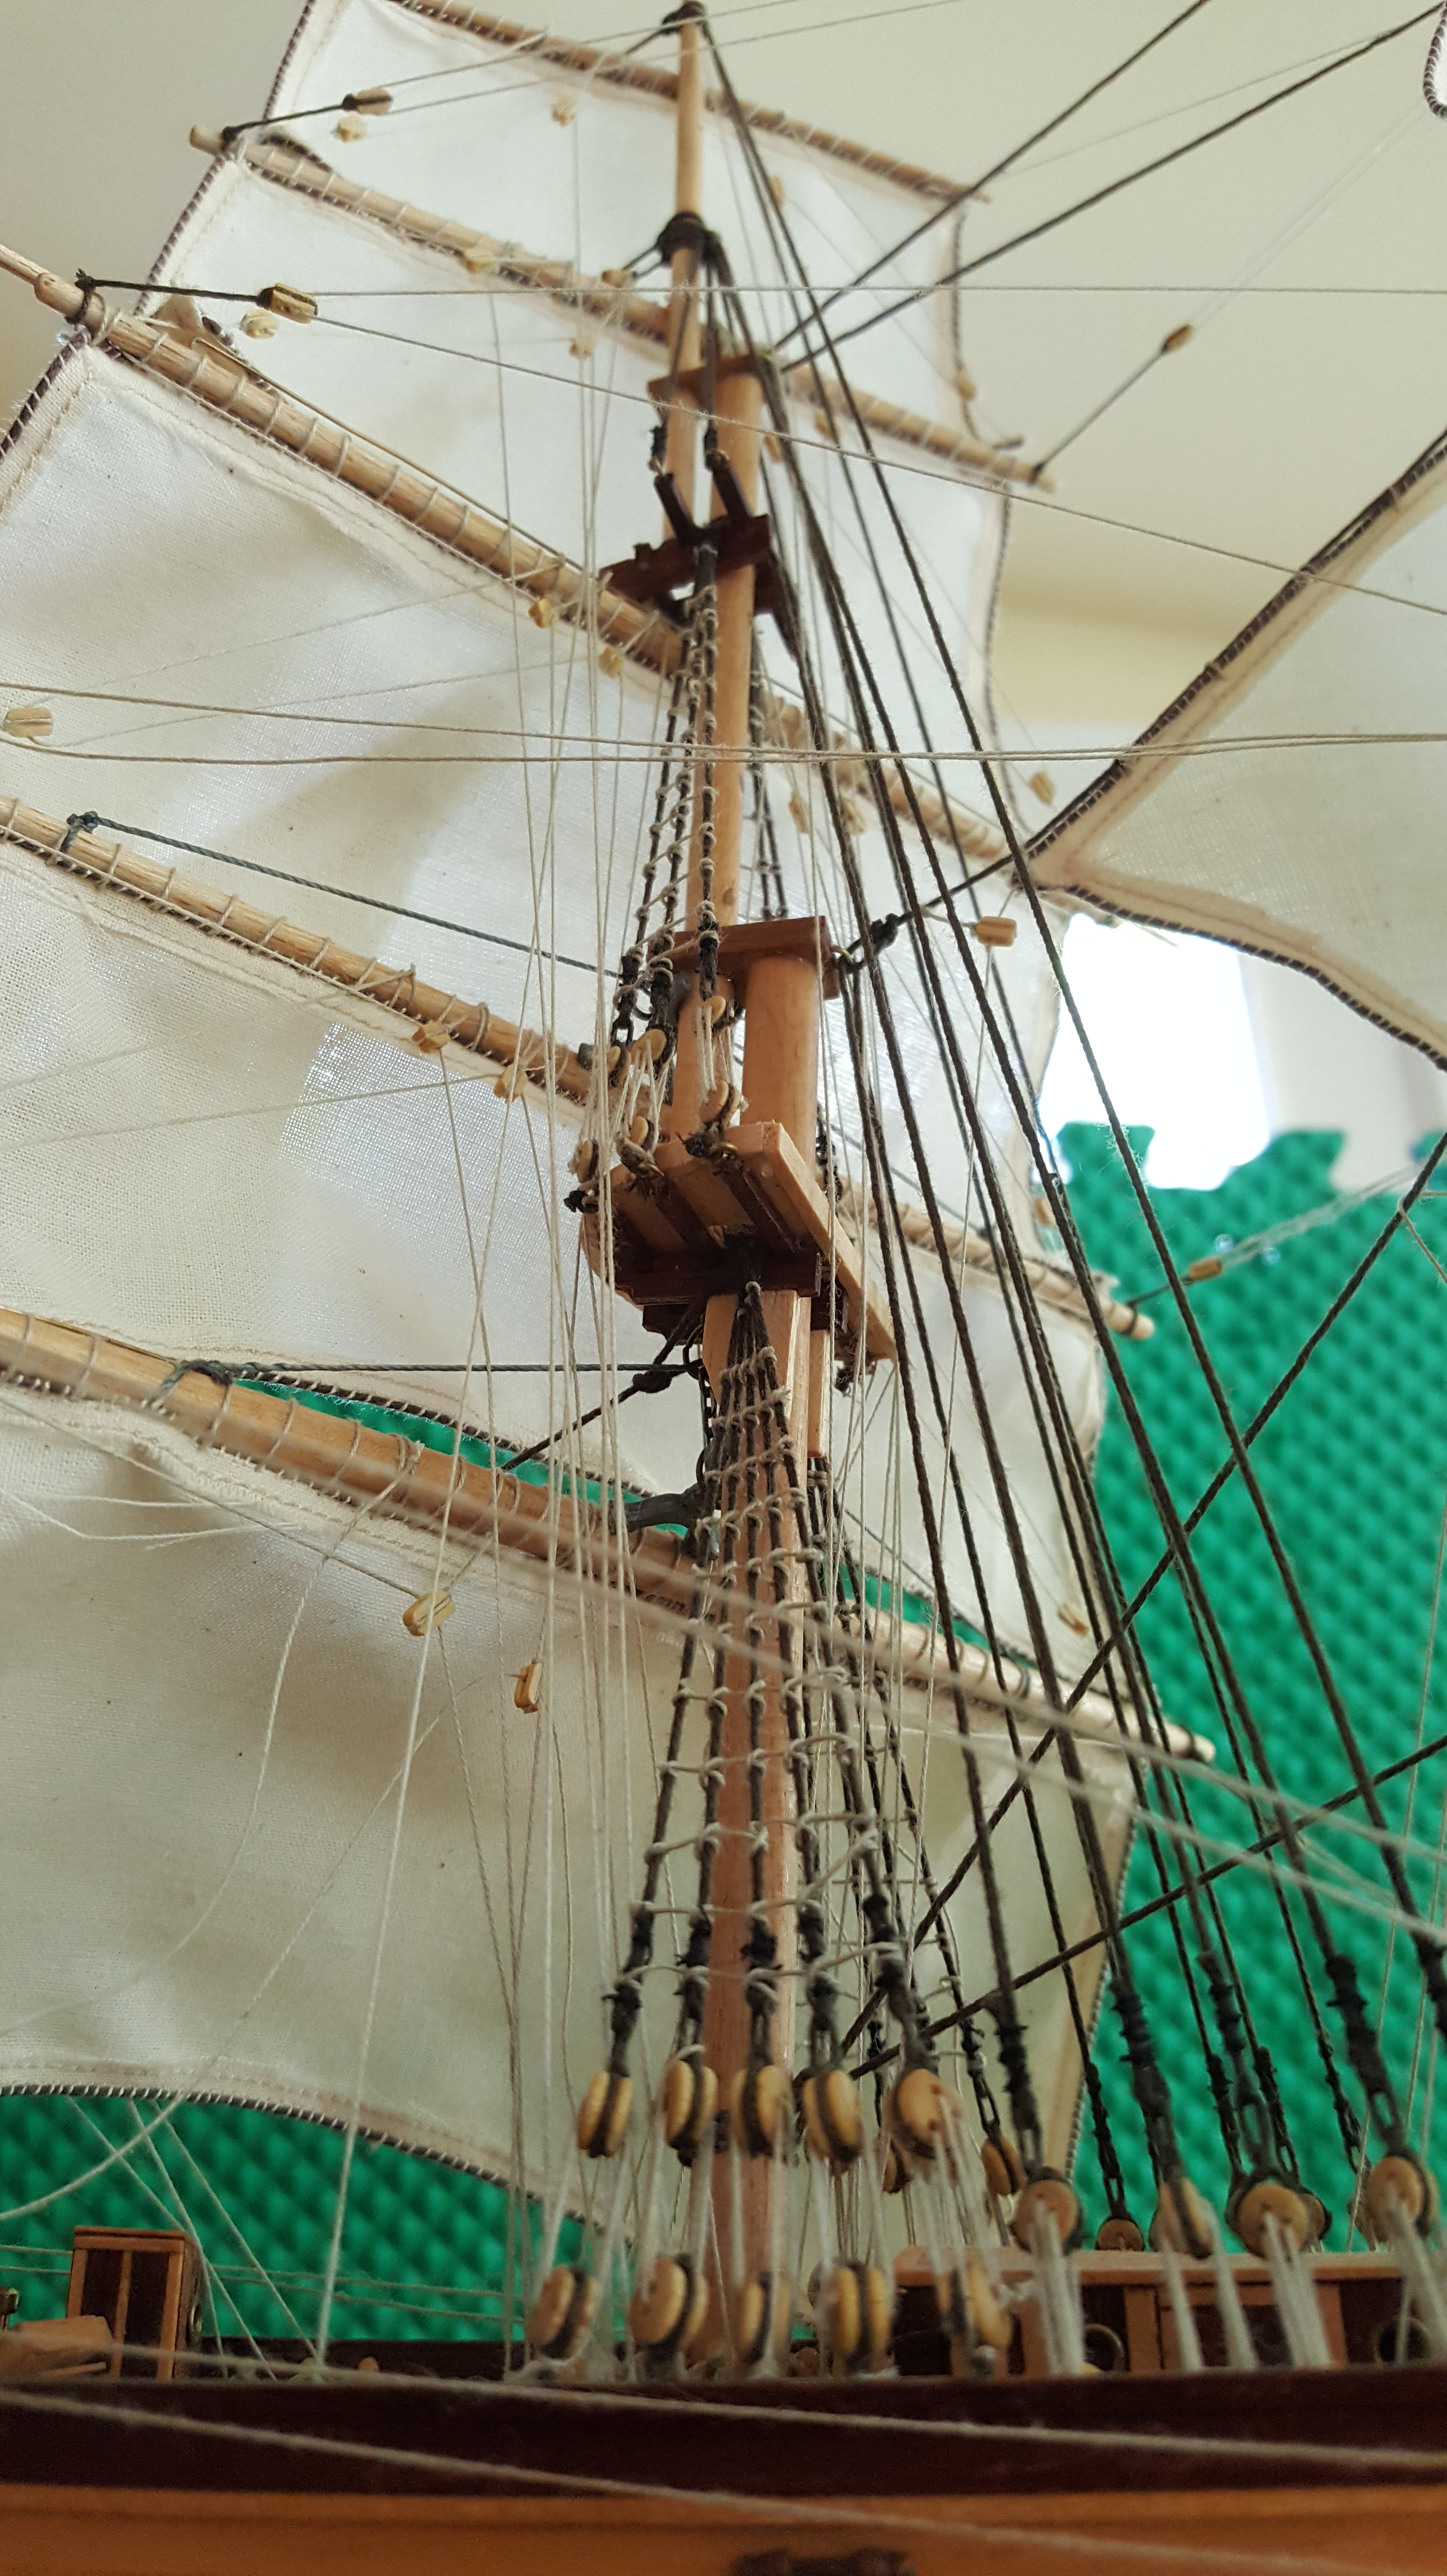
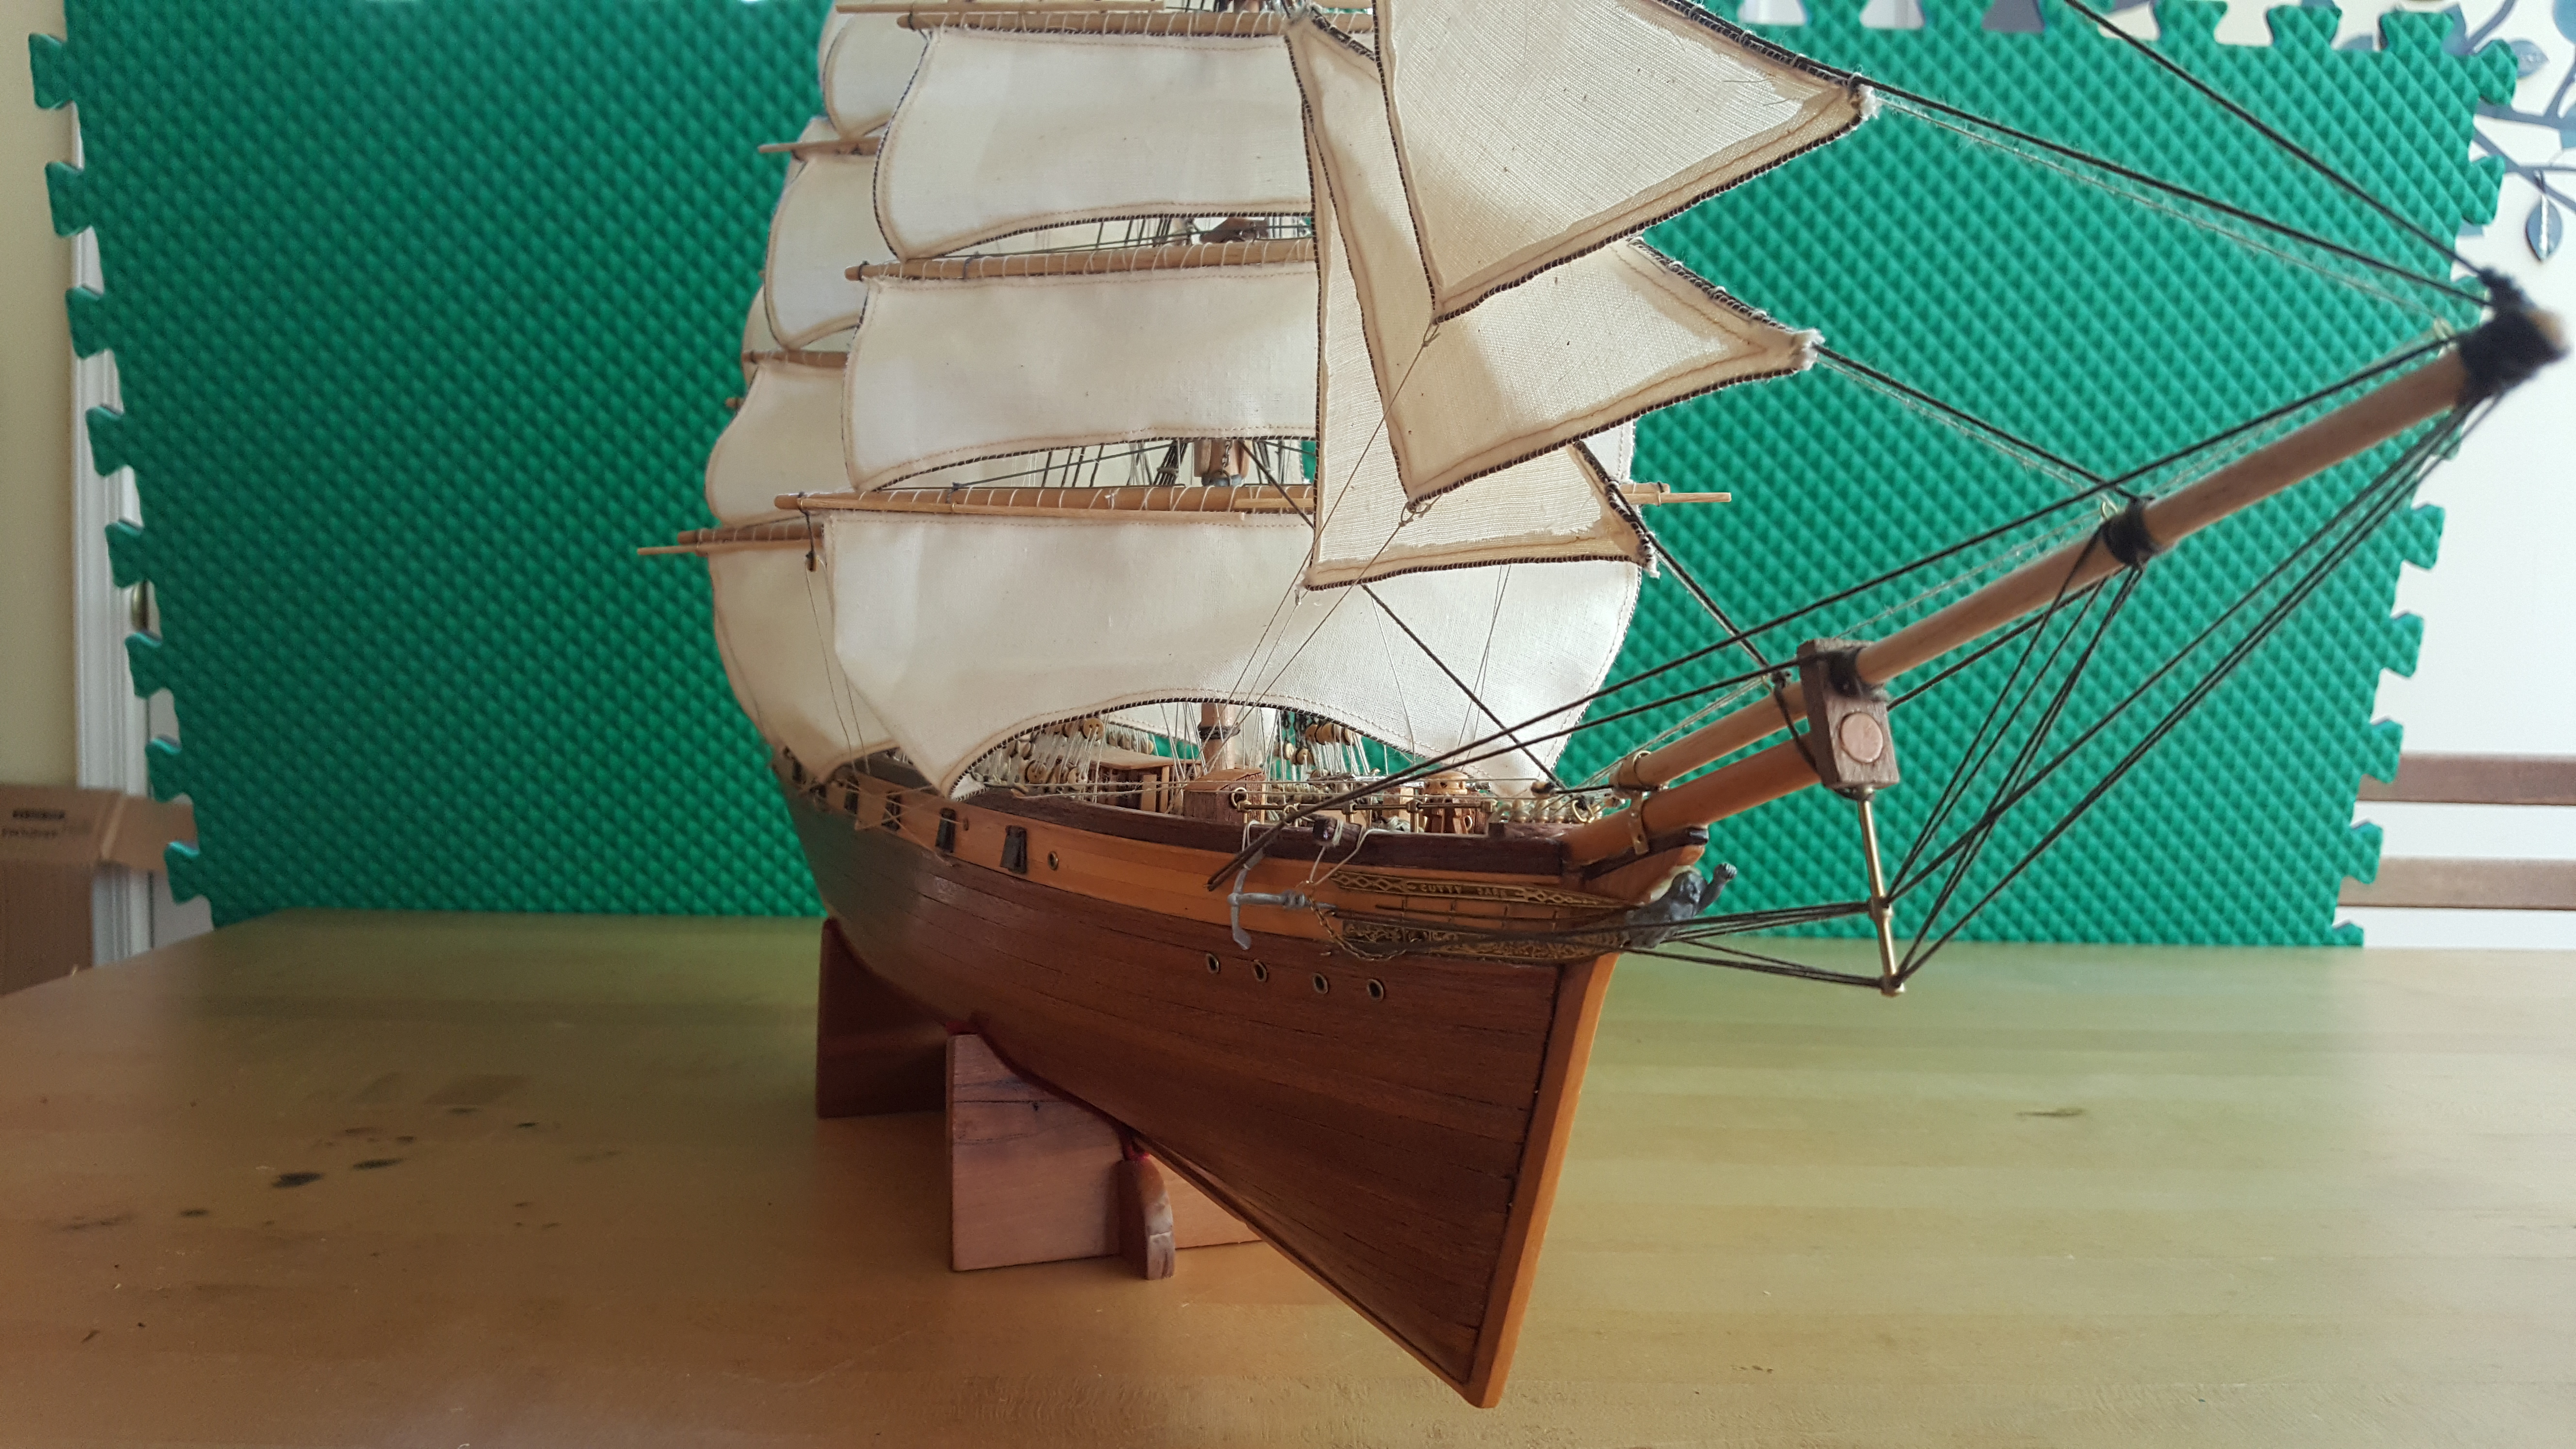
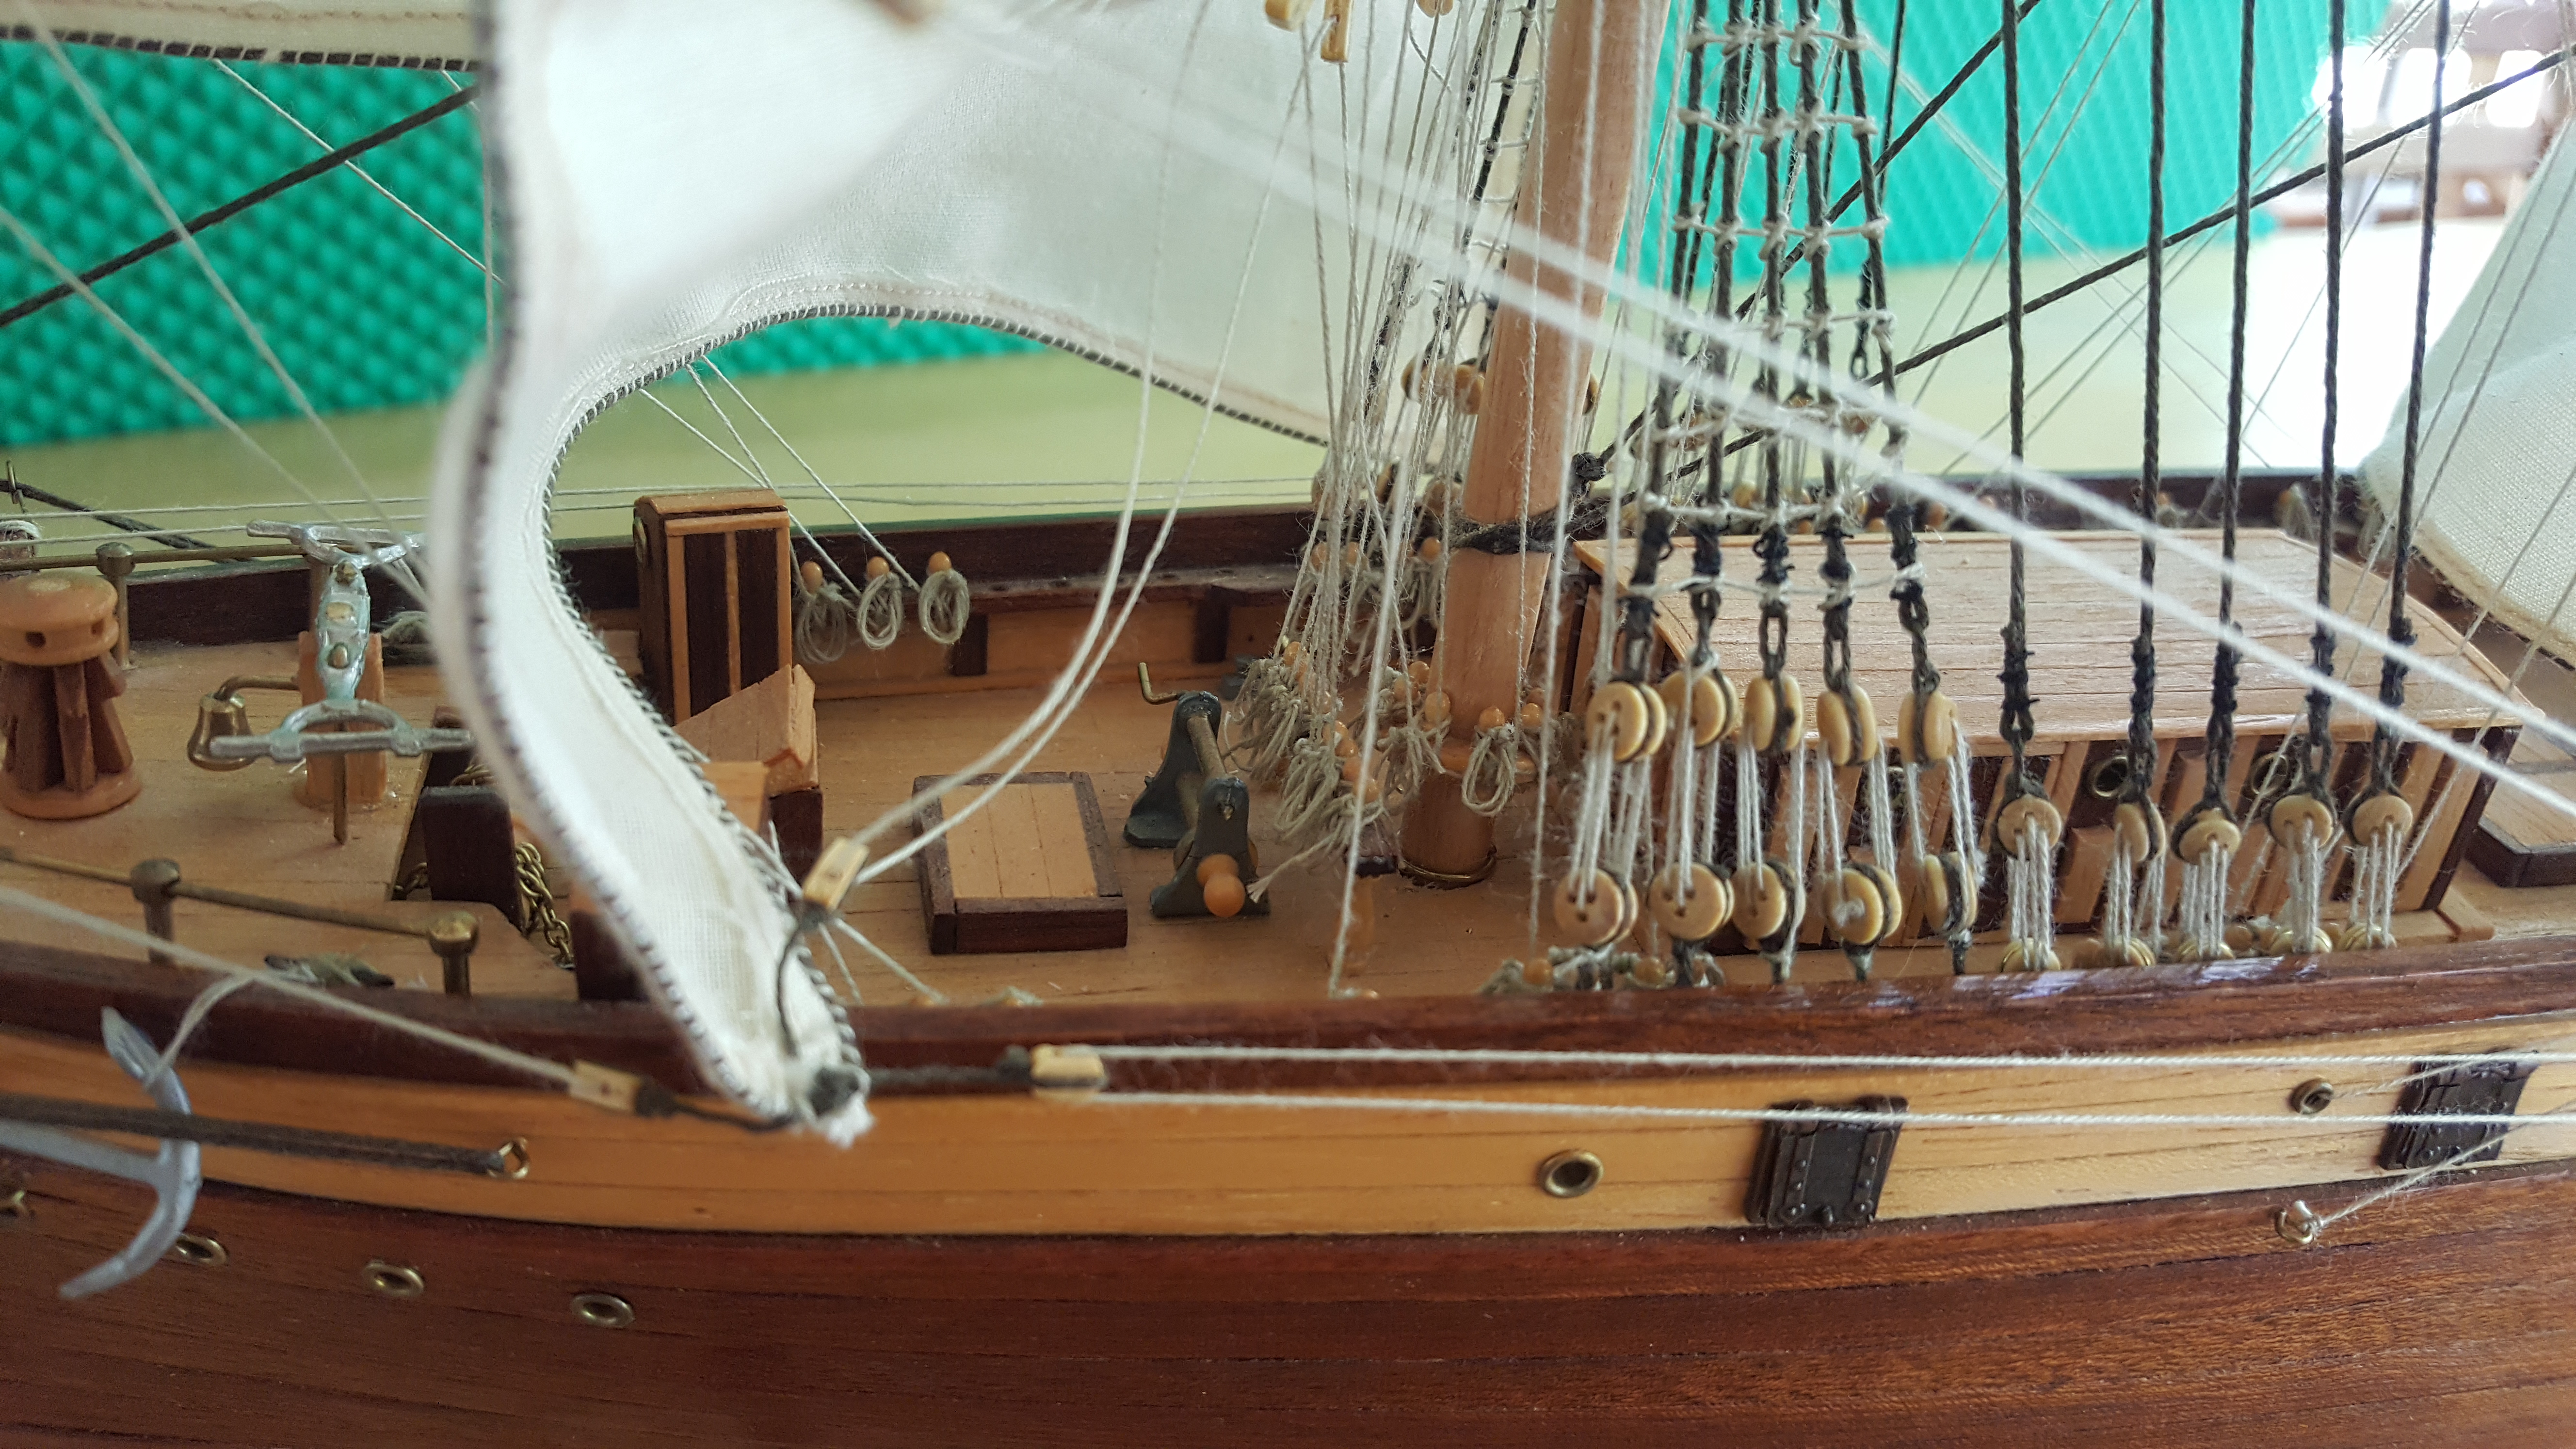
Model of the Cutty Sark. During the quarantine, I finally found the time to finish a model of the famous tea clipper Cutty Sark that I bought during my honeymoon almost 20 years ago. The hull has been completed for a while but I had not had the energy to deal with the rigging until the spring of 2020. It’s now complete, and waiting for the next project: a display case.
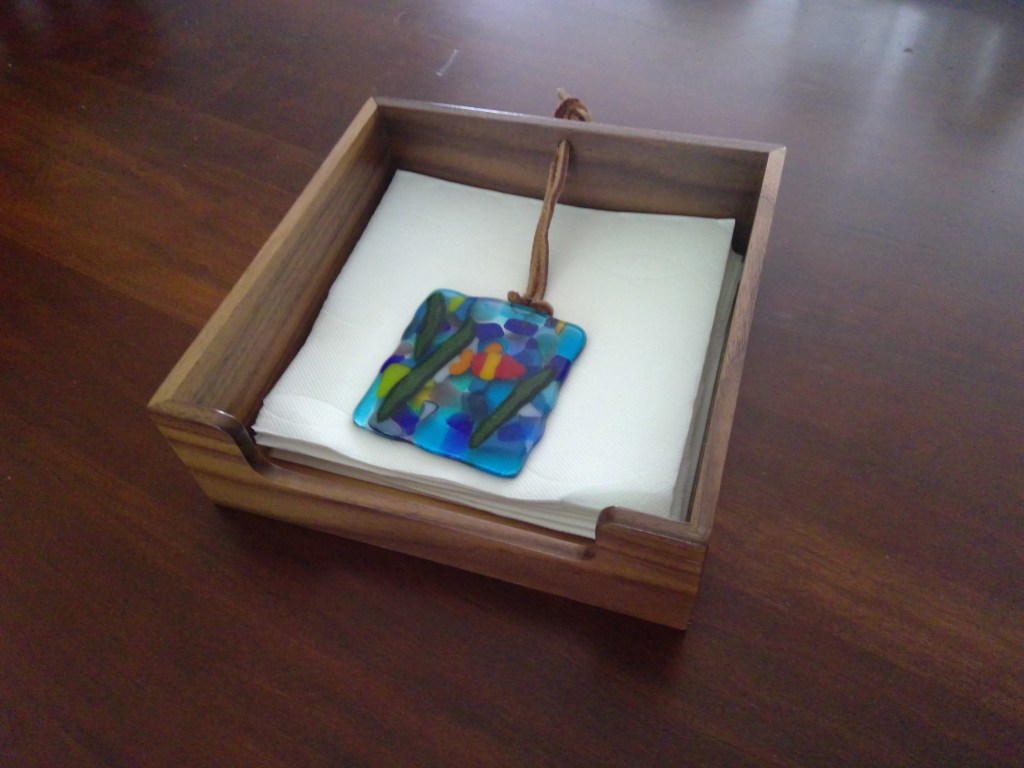
Napkin holder. A fun little project using walnut 1/4″-thick boards and a plywood bottom. Beyond finishing (that always takes more time than one would wish), the most time-consuming step was setting up the table saw to cut perfect miters. The paper weight is fused glass made by my spouse.
DIY teleprompter. Has a hole in the back for a webcam, and a shelf for placing a tablet. I’ve used it to record lecture videos during the fall of 2020, but found it largely unusable as a teleprompter due to the blurry image being projected. It turns out that the glass used in real teleprompters is treated such that the reflection comes from just one side of the glass. With untreated glass, you get two reflections from both sides, and even for thin glass, the double image created makes it hard to read the text. Couple that with the unnecessarily difficult way to mirror the computer display, this projected ended up to be a lot less useful than I had hoped.
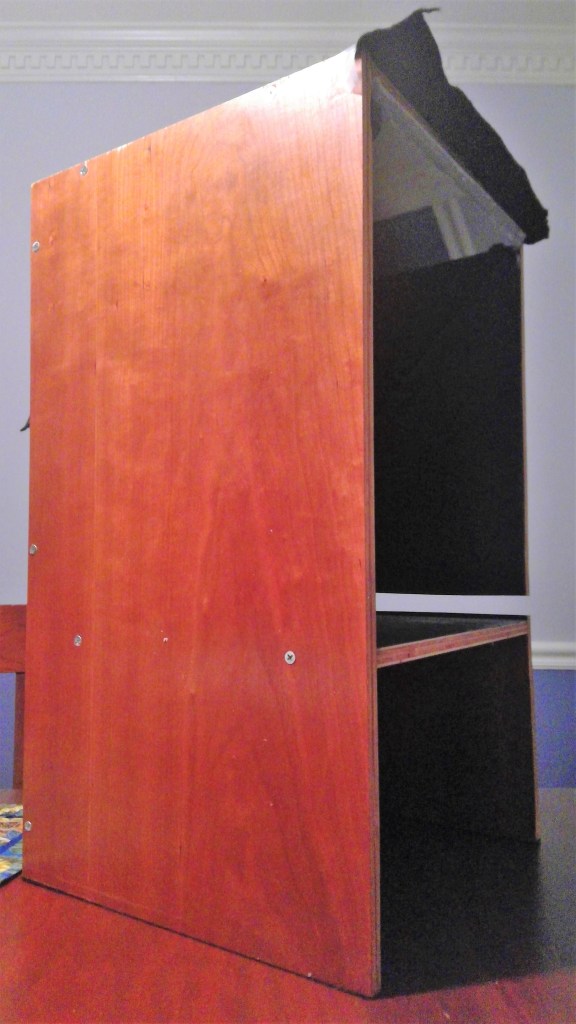
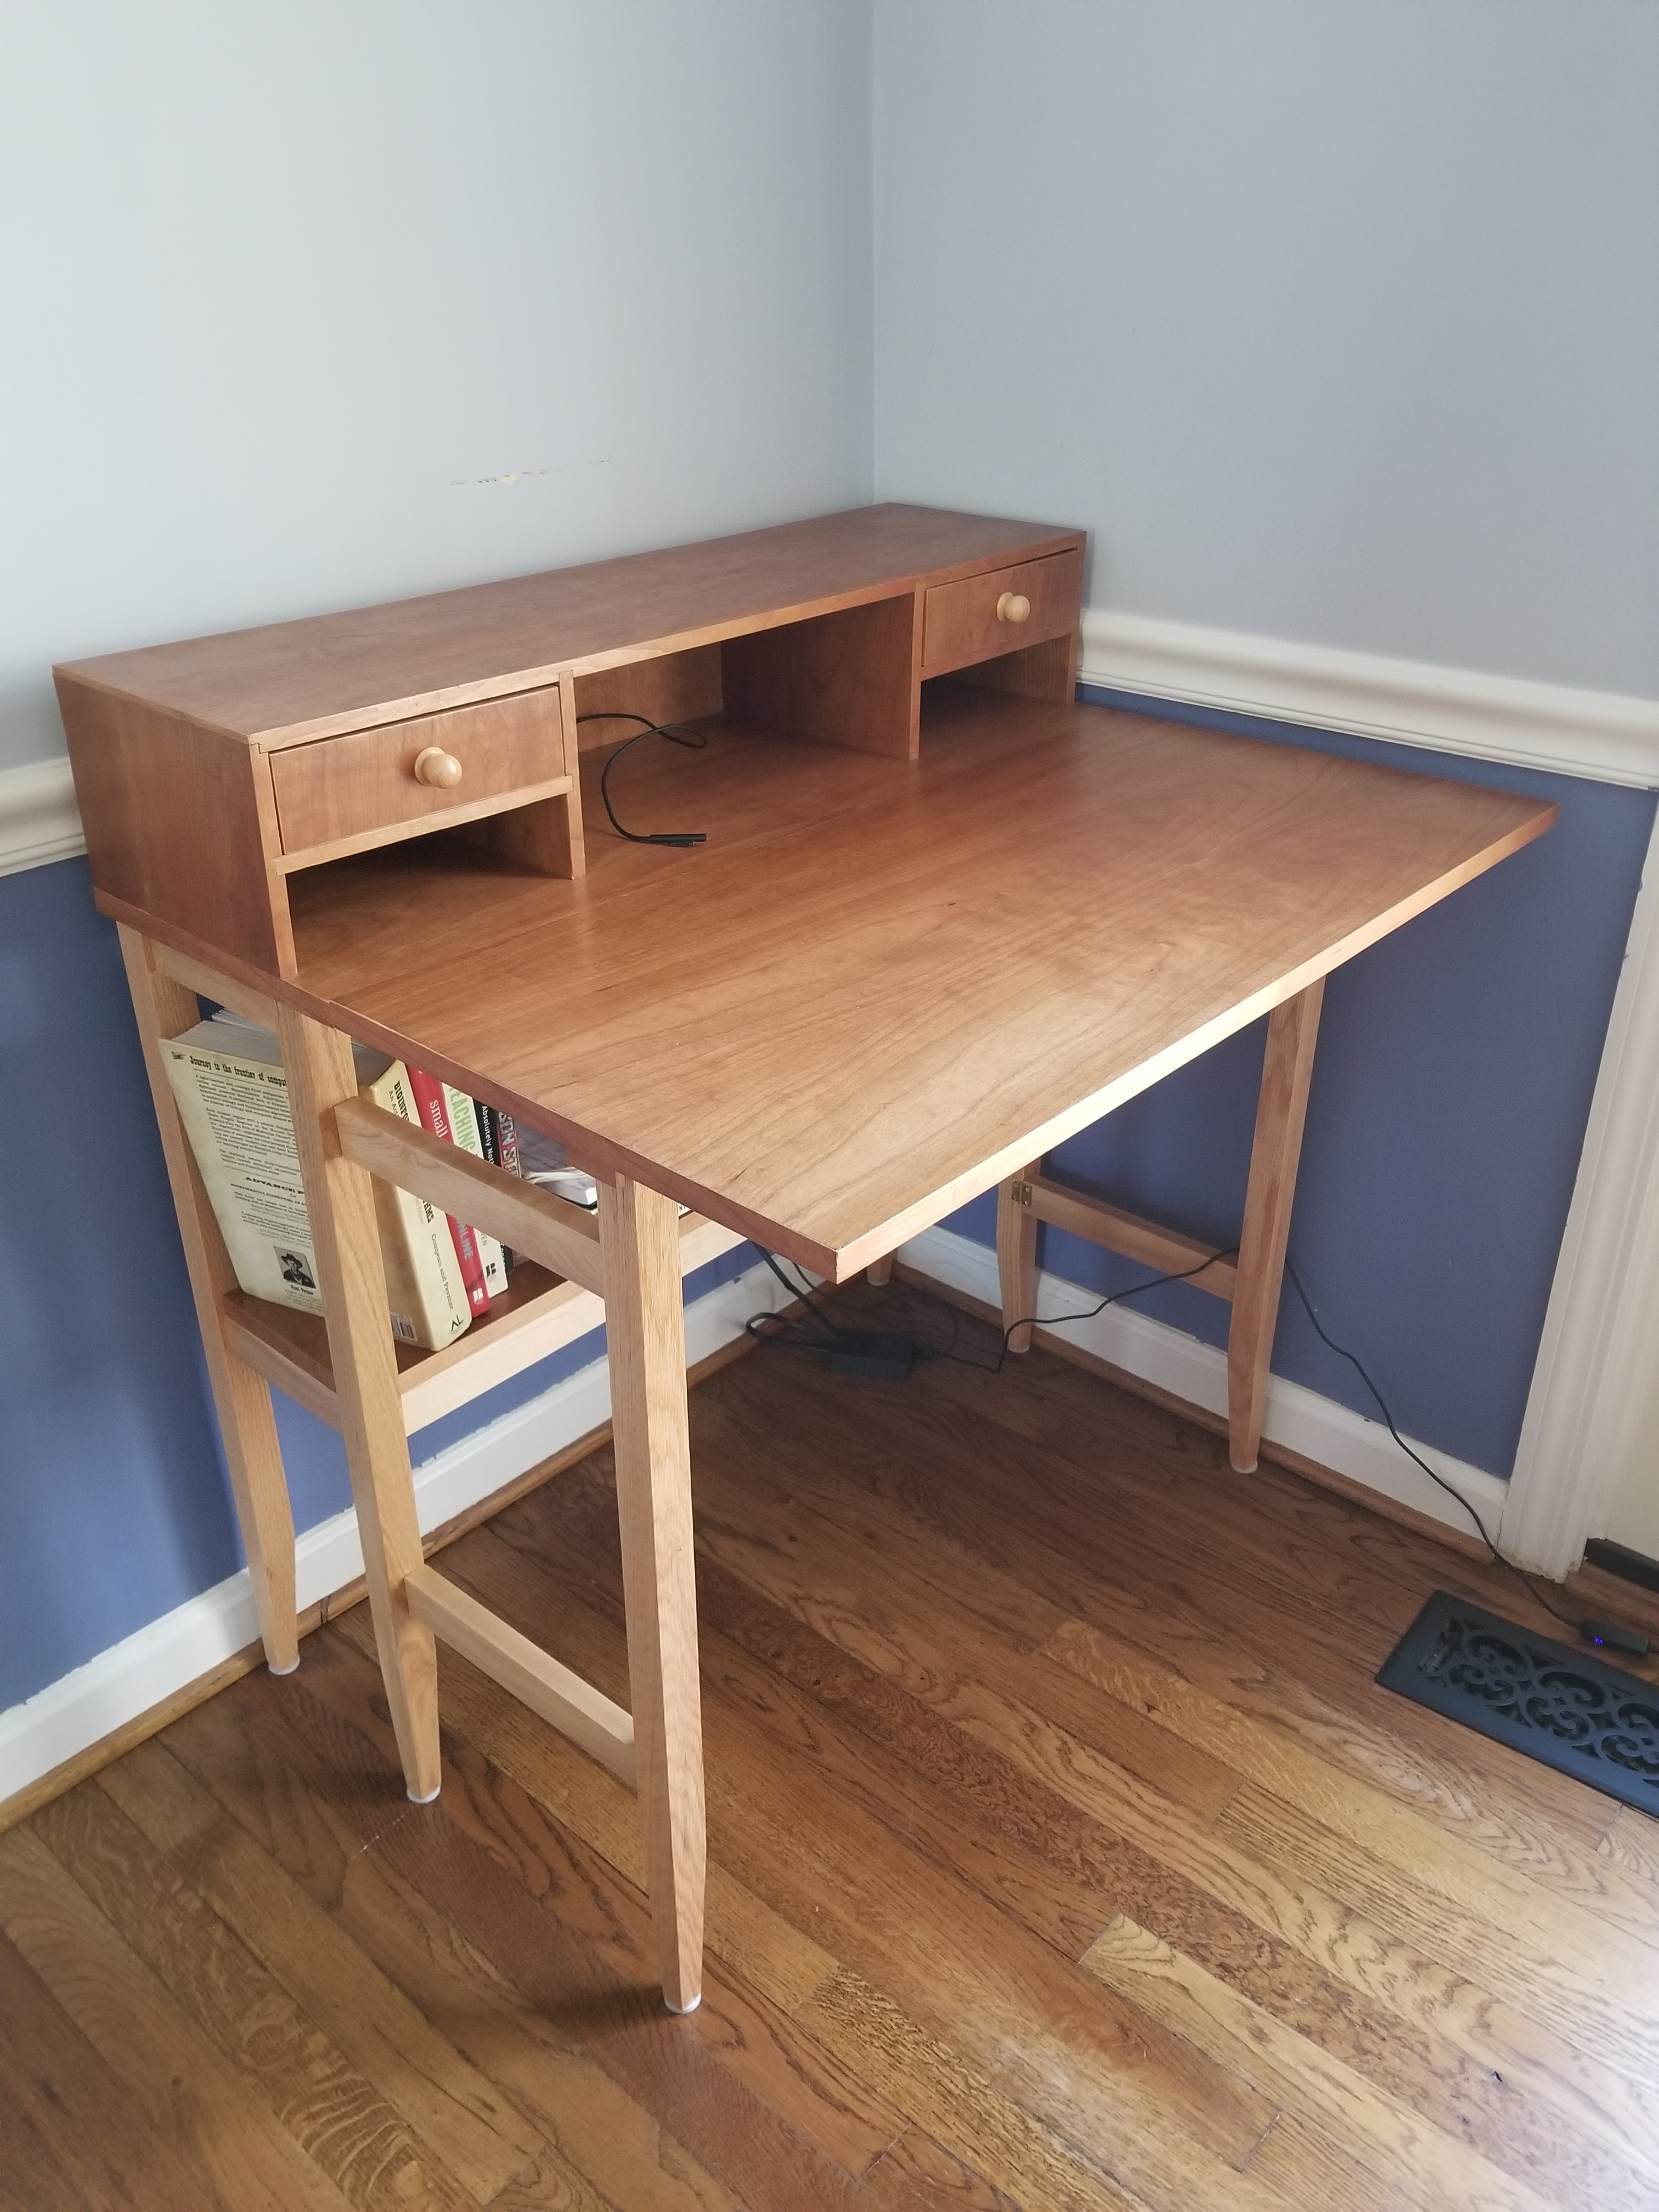
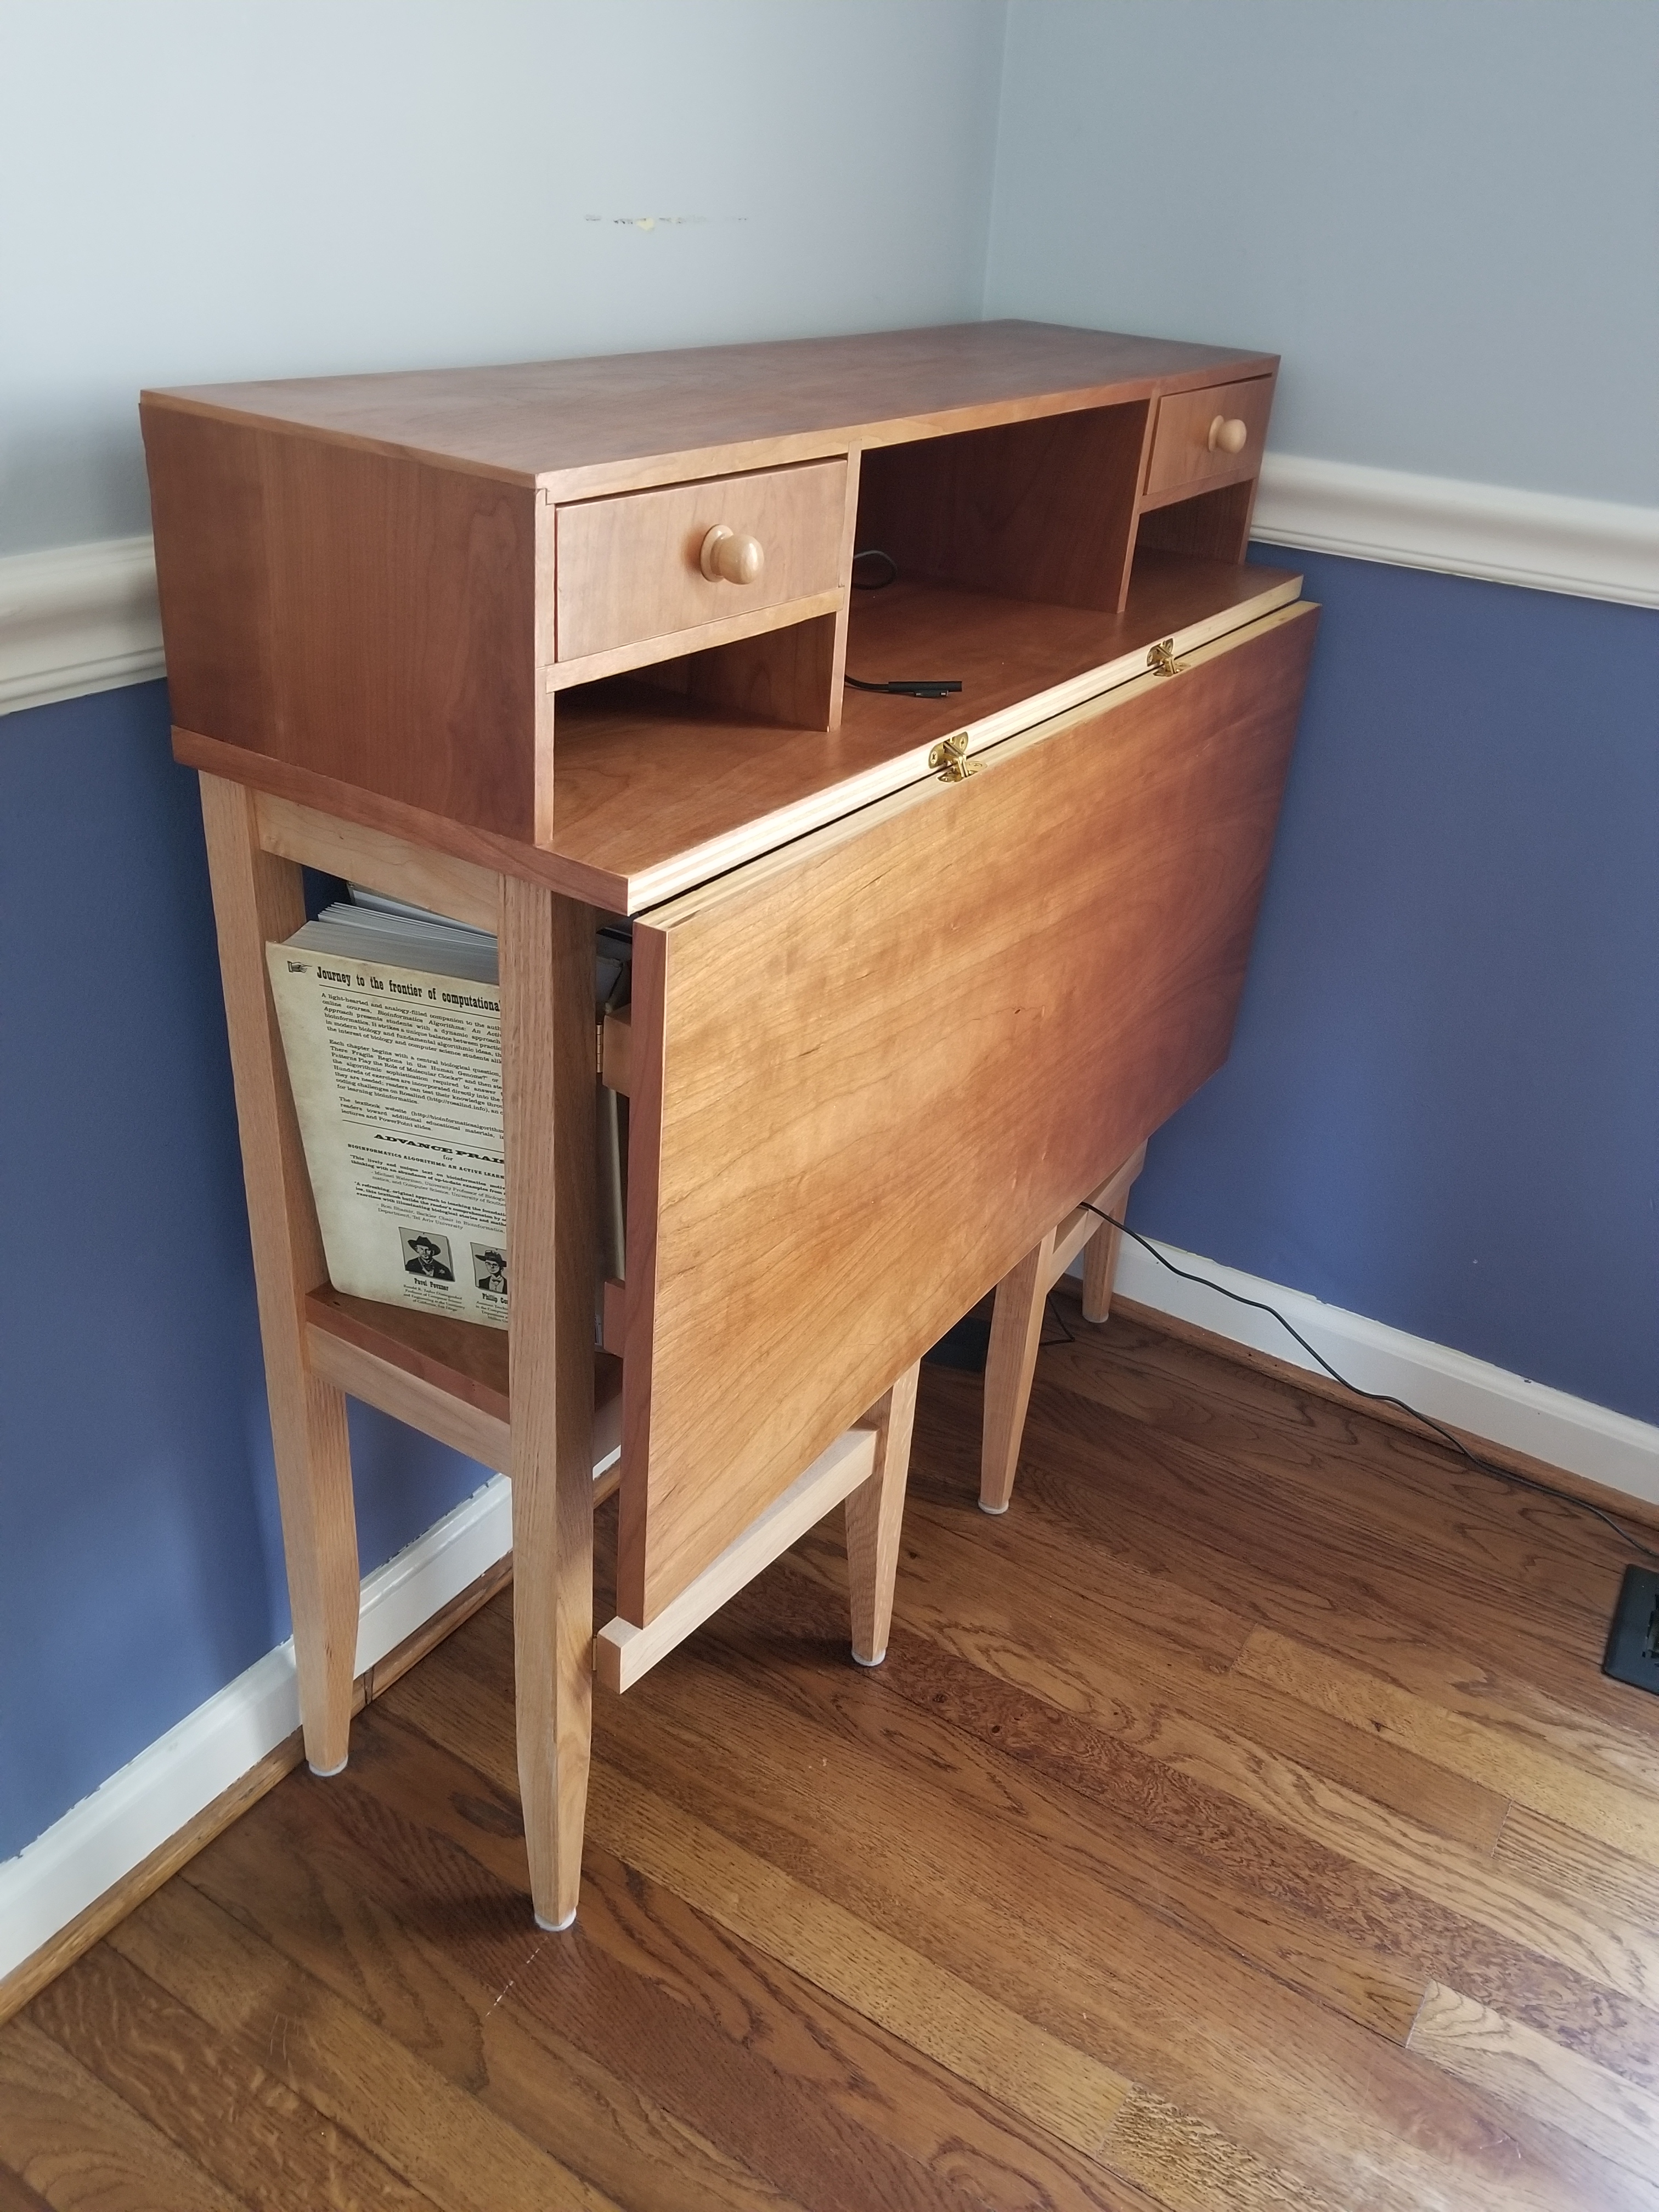
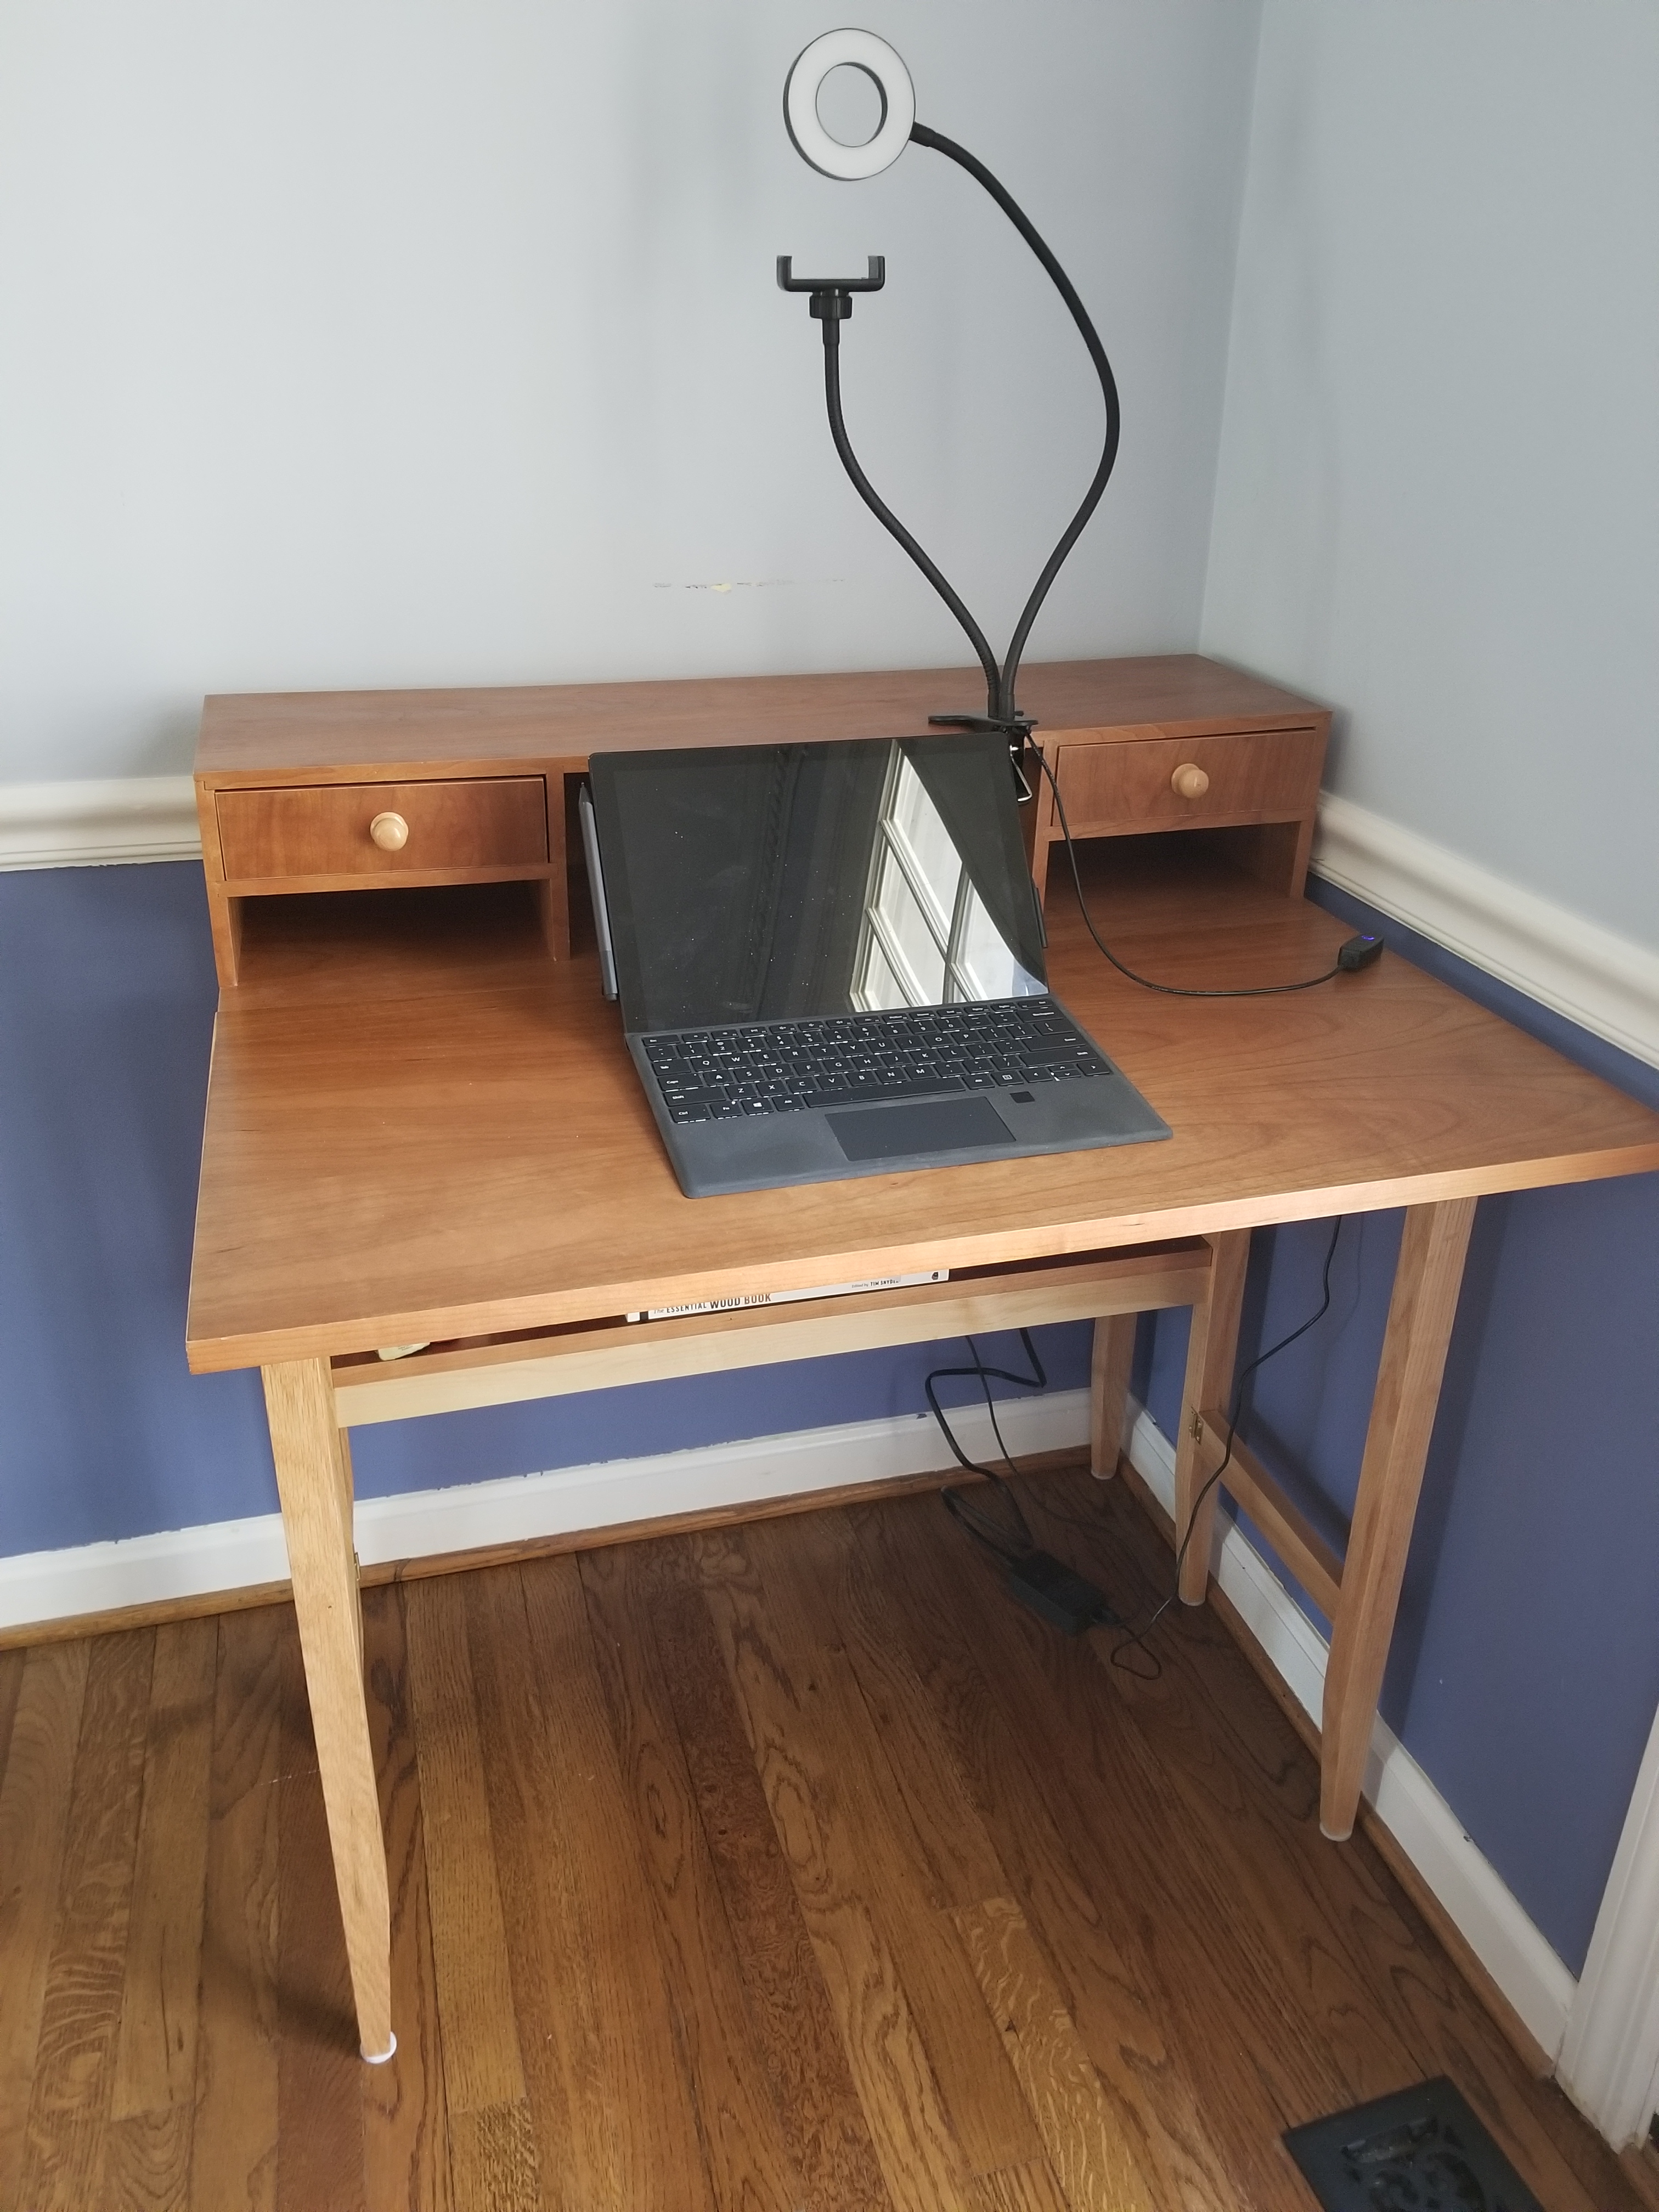
Teleworking desk. After working for a year at the dining room table, I finally got around to building myself a teleworking desk. The front folds down to minimize its footprint when I’m not working, and I’ve built in drawers and shelves for keeping my workspace fairly clean. The flat surfaces are made out of 1/2″ cherry plywood (hutch) and 3/4″ cherry plywood (table top and shelf), and the base has maple rails and oak legs. This project has pretty much cleaned out my cherry plywood left over from other projects.

Martial arts practice/demo knife. I’ve been practicing the Silla Knife Form and was looking for a practice weapon that looks better than the rubber knife we use to practice self-defense. I made this knife out of an aluminum bar and leopard wood that I had picked up out of the scrap bin at the local woodworking store. The handle scales are glued with epoxy and pinned with brass pins. The hardest part of an otherwise simple project was sanding and polishing the aluminum, which also left plenty of gray metal dust in the workshop. I used brass lacquer to protect the blade and keep it shiny, and a satin urethane finish on the handle to ensure some grip.
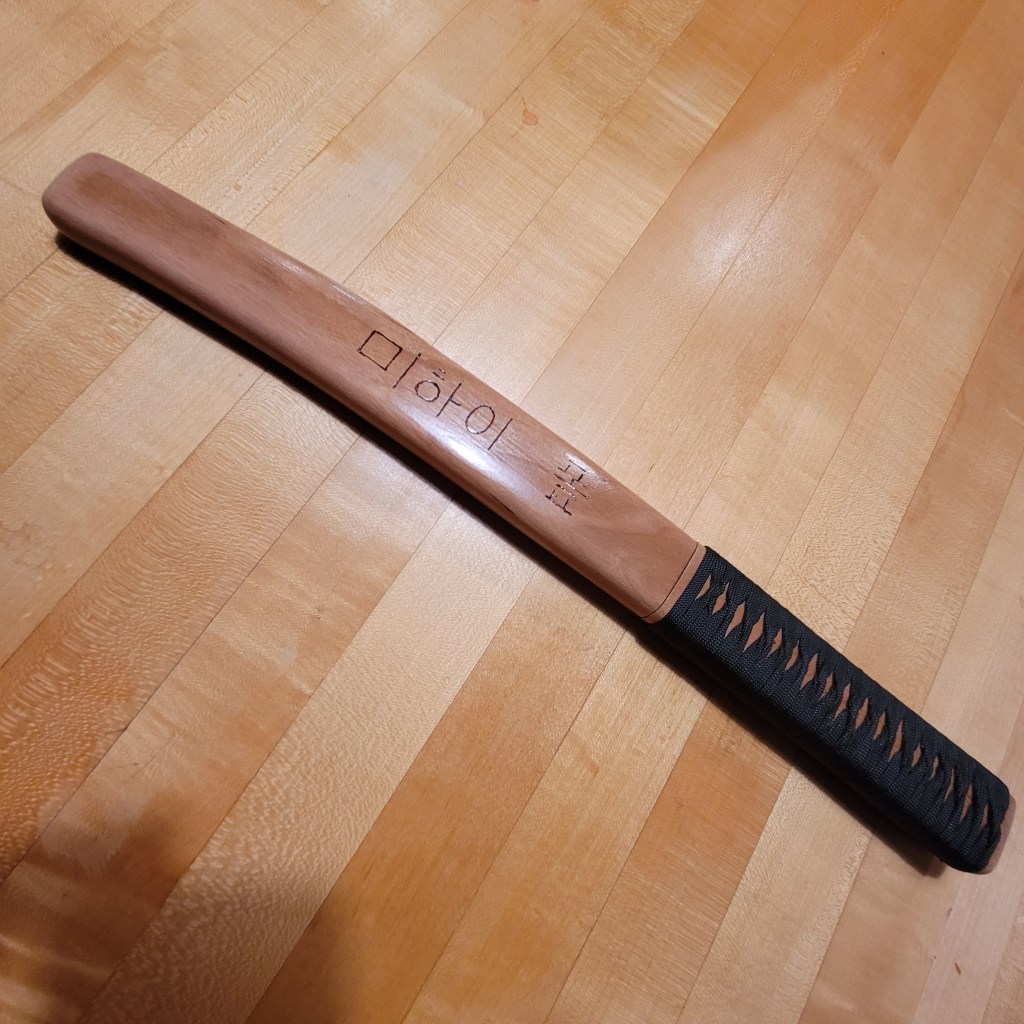
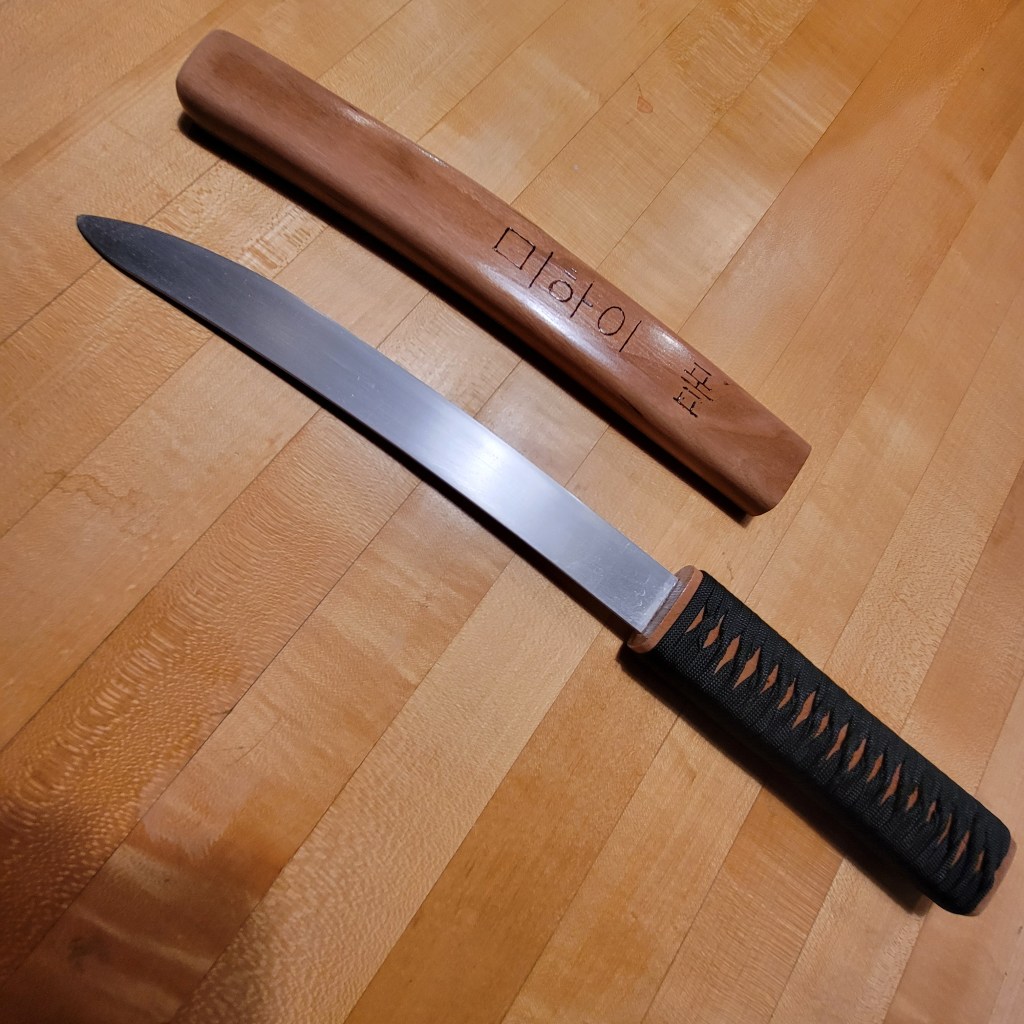
Imitation tanto knife. After complaints that my previous knife looked too much like a kitchen knife, I decided to make one that looked more like a martial arts weapon. This one is also made out of aluminum and has the handle and scabbard made of cherry wood. The handle is wrapped in tsukamaki style, using the outer shell of paracord.
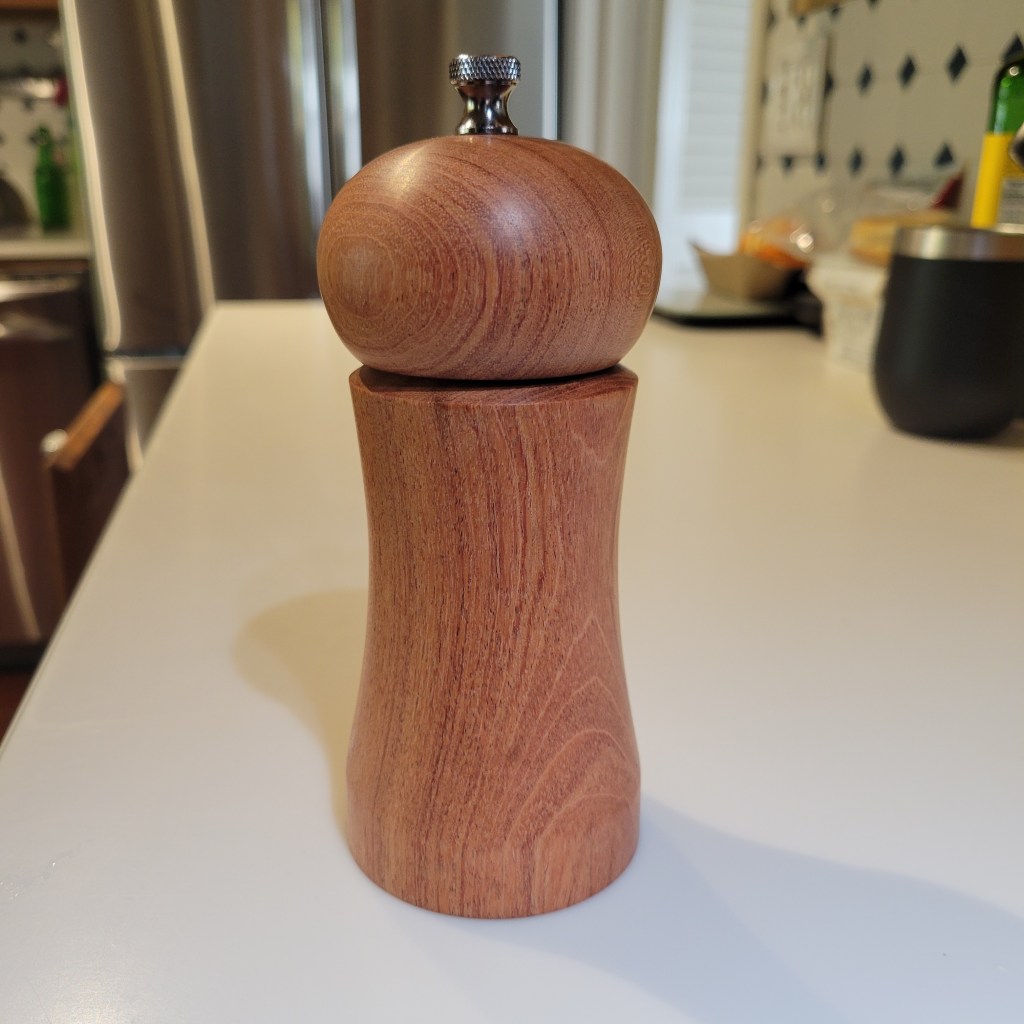
Pepper mill. My first attempt at turning a pepper mill. Not much to say other than that boring the wooden blanks required several purchases (the holes are deeper than the length of the typical Forstner bit). Long story short, this experience gave me the impetus to purchase a bed extension for my lathe, hopefully making boring less boring (I couldn’t help myself, I really mean “easier to do”).
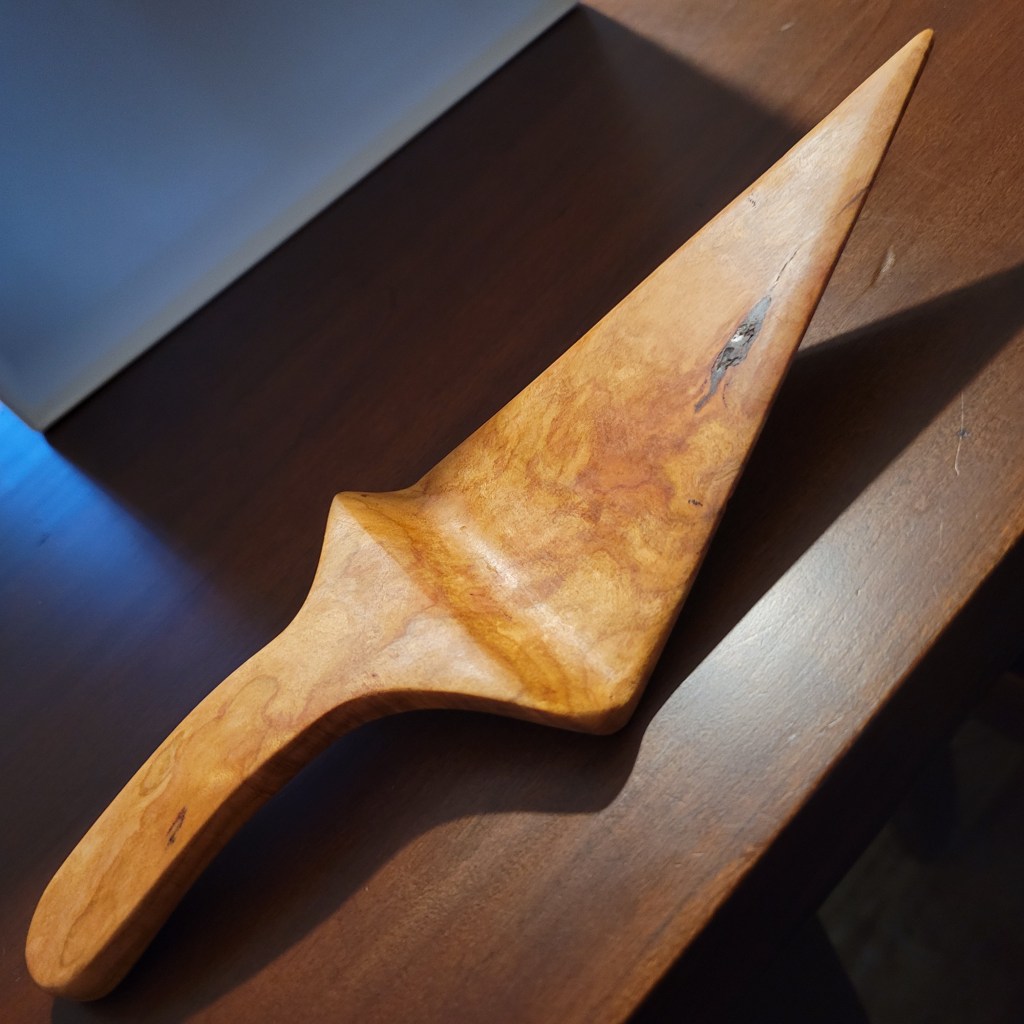
Kitchen utensils. I carved a spoon and a pie server from various pieces of scrap wood. Pretty pleased with the results, though the labor cost probably puts them above what they may cost at a kitchen store.

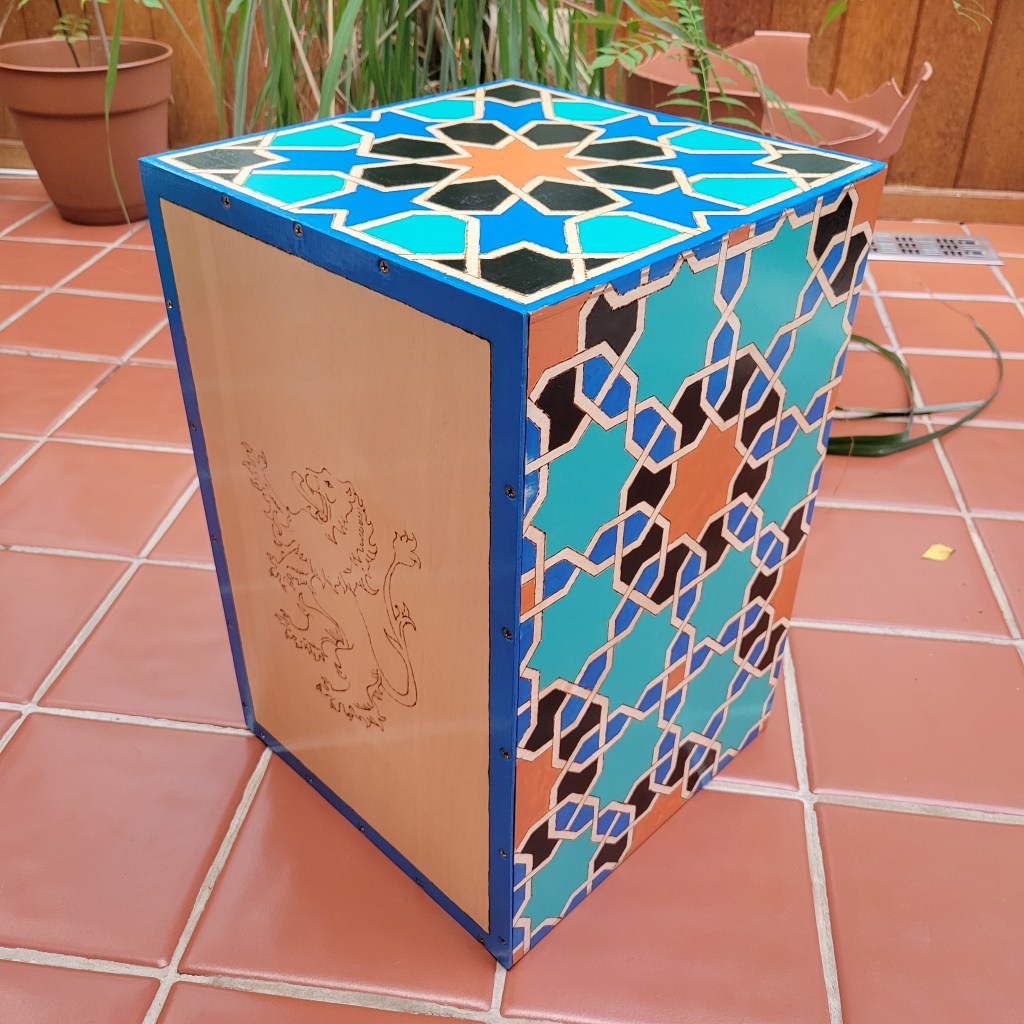
Cajon. Wooden box drum. I was inspired by a flamenco show we saw in Seville, Spain, and by the intricate Moorish geometric designs. For someone who loves geometry, drawing these with a compass and ruler is quite a treat. I also learned a lot about freehand wood burning along straight lines, as well as about painting within the lines.
Moorish-design trivet. Continuing on the Moorish theme inspired by a trip to Southern Spain, I relief-carved this pattern to make a trivet. This project also gave me the opportunity to figure out how to rip a board by hand – the size was simply too large for my bandsaw to handle. The results were somewhat mixed – the surface was not as clean as I had hoped so planing it flat took quite a long time and resulted in a fairly thin piece of wood. I’m relatively pleased with the relief-carving, though that process was also a learning experience.

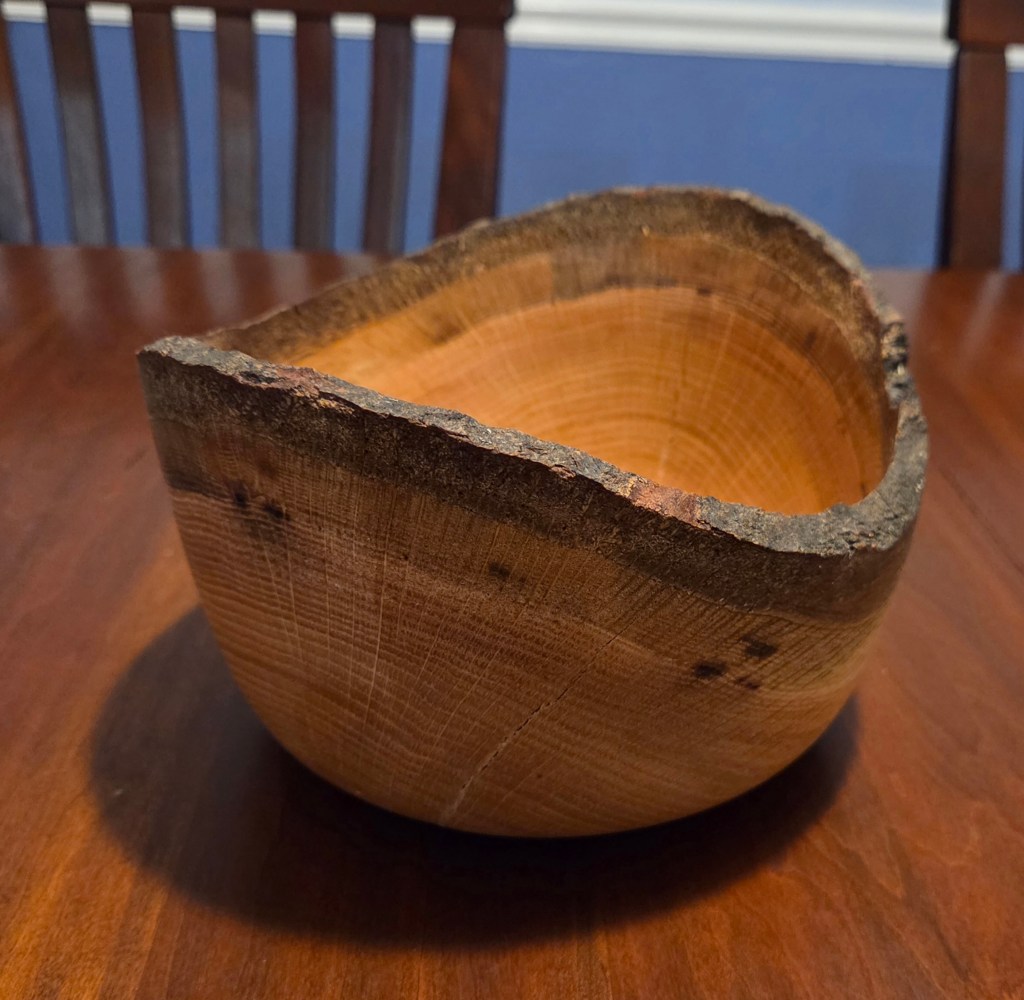
Live-edge bowl. As I still have quite a few bowl blanks gathering dust in my workshop, I decided to try my hand out at a live-edge bowl (meaning that the bark and edge of the log are kept intact). This piece of red oak came from a tree that fell down in my neighbor’s yard. I’m pretty pleased with the end result, despite the many tries it took me to clean up the bottom of the bowl. Next time I’ll shape it in a form more accessible to the turning gouge. Throughout the turning process I had to keep gluing a nasty crack (visible at the bottom of the bowl) that had appeared as the log was drying. Thankfully the bowl didn’t split in half on the lathe.
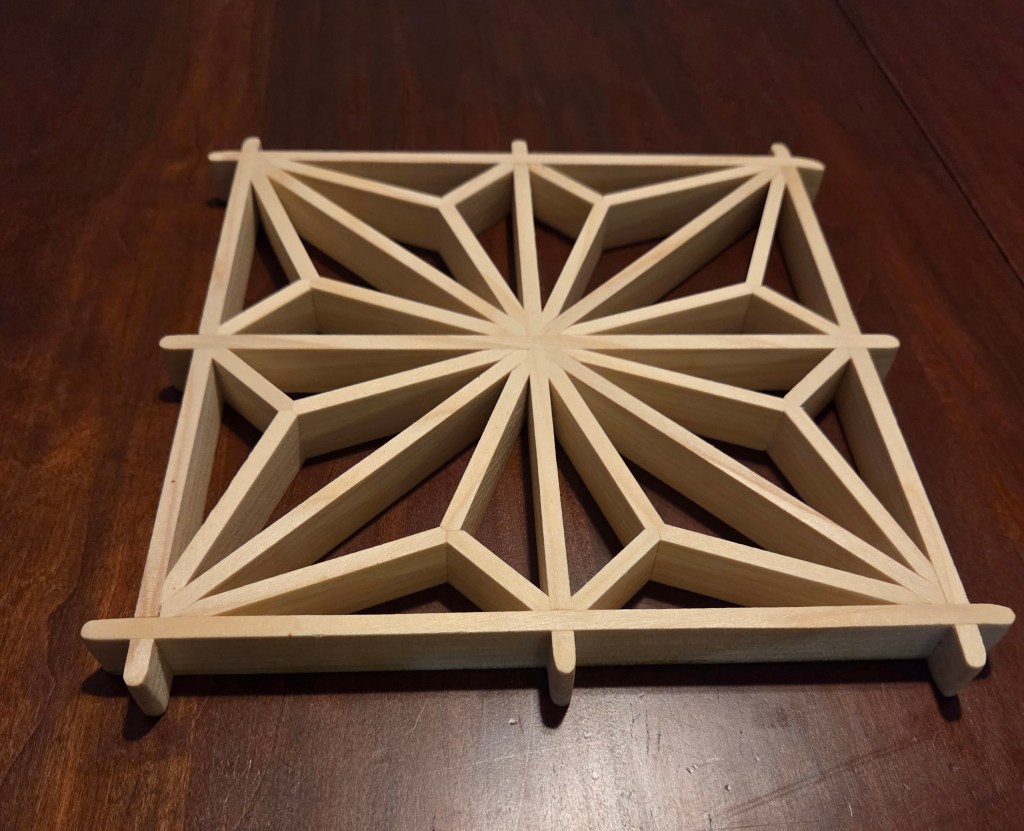
Kumiko trivet. I’ve been waiting for a while to try my hand at Kumiko – the Japanese art of creating decorative panels. My local woodworking store happened to advertise a Kumiko class so I jumped at the opportunity, ending up with the trivet you see here. All the pieces of the design (asa no ha – hemp leaf) are held together without glue, through friction alone. This is yet another fun project for someone who loves geometry. All the pieces have to be cut at just the right angle – this simple piece has cuts at 90, 45, 67.5, and 22.5 degrees. As a bonus, I got to make wooden guide blocks for these angles using a chunk of ash cut from the end of my “big ash board” that I bought a few years ago from a sale of wood salvaged by the county after various storms.